
Table of Contents
You can make a comment on a text passage and, at the same time, also highlight the passage.
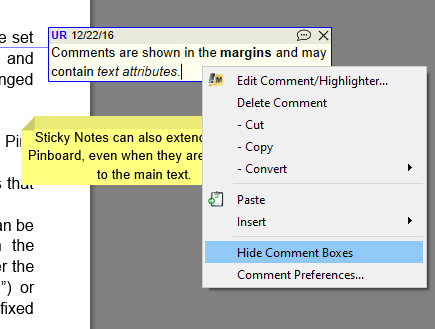
Comments are displayed (they can also be turned off) in comment boxes on the right edge of your document.
Comments can be edited directly in the box and can also be assigned various text styles (bold, italics, etc.) You can also use the “Comment” dialog to edit, but the options here are limited – text style used in the comment box will be lost.
When you create a new comment, it will automatically be written in Arial size 10. If you wish, you can create a style template with the name “comment,” which will then be used for all of your comments.
Comment boxes will show up on the right edge of your document. By clicking on the context menu either in the comment box or on the right edge of the document, you can choose to show or hide the comment boxes.
Comments and sticky notes
The width of the comment boxes can be set in “Preferences” under → “Revisions/Comments.” The color can also be changed here.
Comment boxes can extend out into the Pinboard area to the right of the document.
You can also create large Sticky Notes that extend over the Pinboard .
The settings for the comment boxes can be changed so that they appear only on the right edge (“in right margin”), extend over the right edge (“in addition to right margin”) or they can be given a specific width (“fixed width”).
Special Comment Types (Scenes, Events, Etc.)
The meaning and importance of your comments changes depending on where they are placed. Papyrus Author differentiates between five types of comments by assigning them different colors. You can also choose to show or hide comments and title comments in the Navigator.
Clicking on the comment in the Navigator will bring you directly to the text passage with the comment. Double-clicking will place your cursor in the highlighted comment.
Comments can also be assigned to a heading. These “title comments” will be shown in purple and they will be marked with the ![]() icon in the Navigator.
icon in the Navigator.
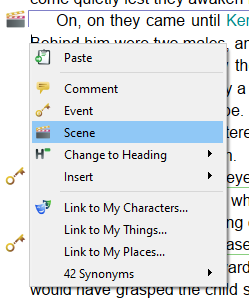
Setting a scene
These comments can all be created in the context menu–just right-click with your mouse ![]() .
.
“Scenes” are a special type of chapters. These don’t have any “real” heading in the text, but they do separate the entire text passage and, thus, work like a sub-chapter.
In the Navigator they show up as a sub-chapter of the main chapter.
In the text as well as the Navigator, they are shown with a clapperboard ![]() icon. The comment boxes for scenes are blue.
icon. The comment boxes for scenes are blue.
Important moments in your novel can be labeled with an “event” or “key event” comment.
These types of comments will be shown in your text and in the Navigator with a key ![]() . The comment boxes for events are green.
. The comment boxes for events are green.
Text mummies are parts of your text that you want to remove but protect from being deleted. It will be kept for you in a “mummy.” You can “mummify” selected text in the context menu.
These text mummies are displayed in red-colored boxes on the right side of your text. If you turn on the “revision tracking” option and delete text, these deleted passages will also appear in red on the right side, just like your mummies.
The settings for the colors and width of the comment boxes can be found in the “Preferences” under “Appearance” → “Revisions/Comments.”
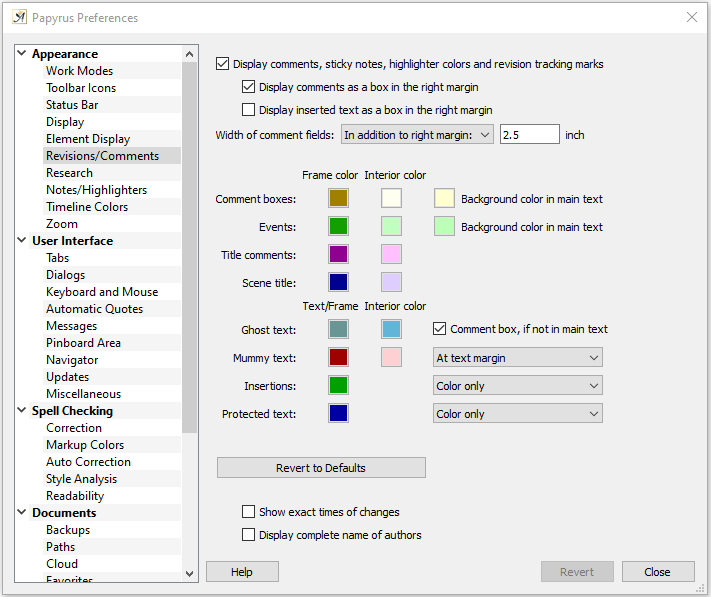
“Revisions / Comments” Settings
The settings in this dialog are valid for normal and special comments (“Events,” “Title comments,” and “Scene titles”).
Revisions/Comments settings
Colors can be assigned for the text/frames, the interior and the background of marked main text.
There are also settings for revision tracking (“Track Changes” under the “Document” menu) which can assign a different color for deleted passages / mummy text and insertions.
You can also decide how you would like your “Ghost text” to appear in your document.
The parts of your text you would like to prevent from accidentally being deleted or changed can be labeled as “Protected text,” for which you can change the color here.
Highlighters for Special Background Colors and Comments
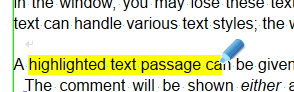
A highlighted text passage
You can use the highlighter icon ![]() in the toolbar to mark your text with a color. As opposed to “real” background color (settings in the “Color” window), which will affect the print version, the highlighter will only change the background color of the text passages you select while working. The text itself will be printed in the normal black.
in the toolbar to mark your text with a color. As opposed to “real” background color (settings in the “Color” window), which will affect the print version, the highlighter will only change the background color of the text passages you select while working. The text itself will be printed in the normal black.
In the “Text” menu under “Edit Comment/Highlighter” or via the context menu–right-click on the highlighted text–you can open the Highlighter/Comment dialog, in which you can change the highlighter colors and settings. Alternatively, you can also select the text and then click on the highlighter icon ![]() .
.
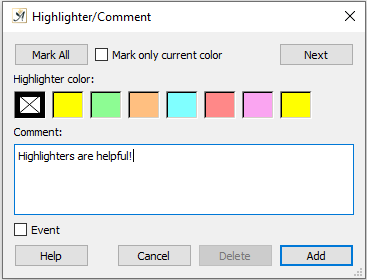
The Highlighter/Comment dialog
This also works for discontinuous blocks of text. You can use the “Mark All” button to mark all highlighted blocks of text throughout your document.
The “Next” button automatically jumps to the next highlighted text in your document.
Be aware that the “Highlighter” dialog is limited when it comes to text styles. If you write a comment in a comment box in a specific text style and then edit it in the dialog, you lose these text styles. Papyrus Author’s comment boxes on the edge of your text can handle various text styles; the dialog, however, cannot.
A comment for highlighted text
A highlighted text passage can be given a comment text of your choice.
The comment will be shown either as a comment box on the right edge of the text or in the status line and as a tooltip box when you hover your mouse over the highlighted text (can be shown or hidden in the context menu for the right edge).
If you have hidden the comment boxes, those places that contain a comment are indicated with a “+” symbol. If you have not added a comment to the highlighted text, a small dot will show up in the lower-left corner. Double-clicking on this symbol will open the highlighter window.
Comments and the highlighter color of your document will not be printed. If you would like these elements to show up when you print, you can change this in the print dialog under “File” → “Print” → “Special Print Options” → “Print as shown on screen.”
Notes/Highlighter Color Settings
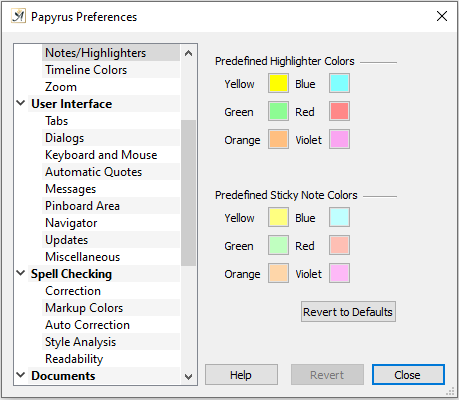
Notes/Highlighter color settings
In the Papyrus Author preferences under “Appearance ” → “Notes/Highlighters” you can change the six preset colors for the highlighters and sticky notes in your main text and the Pinboard (clicking on a color will bring up a dialog in which you can change it).
It’s up to you which colors you would like to use for the six color options. In theory, you could even change the blue sticky note setting to an electric pink, but it is a better idea to choose colors that fit together.
 on March 30, 2020