
Table of Contents
The “Page Layout” sets the margins, from where your text begins up to the edge of the paper, as well as the header and footer areas (for page numbers, footnotes, etc.).
The layout also includes the number of columns in the text, the page numbering, the chapter headings in the header or footer area, as well as the form of text wrapping in your columns. You can also assign a background picture under page layout.
The basic master page settings can be set in the “Page Layout” dialog.
A page layout can be applied to an entire document, or you can choose to work with “master pages” and apply them to specific sections of your text.
A style template used for a page layout, or “master page,” works like a made-to-measure suit for a page of your text, which keeps a uniform look.
You can change master pages as often as you like throughout your document. Each master page will be assigned a range of page numbers to which it will be applied.
For example, page 1 could have a basic layout with a letter heading on the top and a footer with dates and company information on the bottom. Starting at page 2 though, the text should have a page number at the top and two columns of running text, so you can apply a new master page.
A master page can have differing left and right margins and the pages can also mirror each other (for example, for a bound book).
There is the powerful, though slightly more complex option to design your entire master page layout yourself. To do this, go to the corresponding master page (jump there from the dialog or access the master page by double-clicking into the headline of your document). Here you can create free layouts like multi-column newspaper layouts and more.
You will find an example of this in “Example Documents” under “Page Layout.pap.”
Creating a Document Layout
For basic page layouts you can format your master page in the Page Layout dialog (menu “Document” → “Page Layout”). The options apply to the master page currently used.

The Page Layout dialog
Here you can set the margins, the number of columns, and the size of the header and footer areas for your document.
The header area (and the footer area) are especially important because this is where the page numbers will appear.
You can choose to change the layout for a “double-sided document (right and left pages).” The “front side” and “back side” of the pages will then be automatically mirrored. What actually happens is that two master pages will be used–one for the right and one for the left. The header and footer areas, however, will not be automatically mirrored, so they need to be handled separately.
Changing the Layout of Master Pages (For Page Numbers, etc.)
When you want to have full control over the columns or want to insert graphics into your page layout, then you will need to manage them directly in the master page.
To get there, right-click on the border outside your text area.
On the master page you will see the gray-colored area for running text, the white header/footer areas, and any other graphics. All of these elements will be applied to any pages that have this master page layout.
In the header or footer area (created in the “Page Layout” dialog) you can add a placeholder for page numbers (“Insert Page Number” in the context menu ![]() ).
).
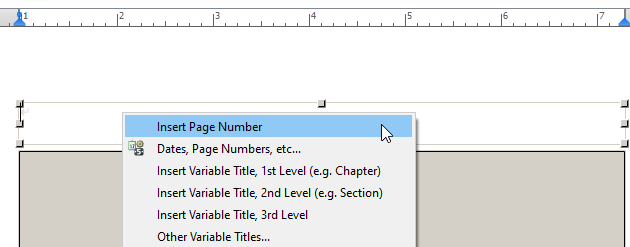
The header area for inserting page numbers, dates, etc.
The context menu also allows you to add a “variable title,” which will display the current chapter or section heading on your page.
If you go into Graphic Mode (hit ![]() or click on
or click on ![]() in toolbar), you can change and resize the running text frames and the header/footer area.
in toolbar), you can change and resize the running text frames and the header/footer area.
The difference between the running text frames and the other graphic objects is that the running text appears on every page that has been assigned this master page and it “runs” over the end of the page onto the next.
To start, the number of running text frames will be determined by the number of columns you have selected in the page layout dialog. This can be done before or after you switch to graphic mode.
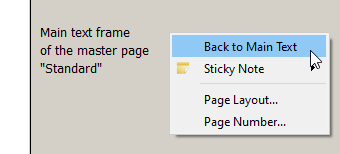
By clicking on the running text frame, you can get back to the main text
New running text frames can be added to the page by copying and pasting with your mouse while holding down the ![]() -Button.
-Button.
New frames will automatically be added to the end of the other running text frames.
To exit the master page view and go back to the normal view, click on a running text frame and a pop-up will appear to go “back to the main text.”
Master pages are templates that span multiple pages and which contain a header and footer area. This area can be automatically filled with information of your choice, such as the current chapter heading.
These “variable headers” are created using references to specific hierarchy levels within your table of contents (main chapter, sub-chapter, …).
You can enter the header/footer area by clicking in it.
Then you can right-click ![]() on the appropriate entry.
on the appropriate entry.
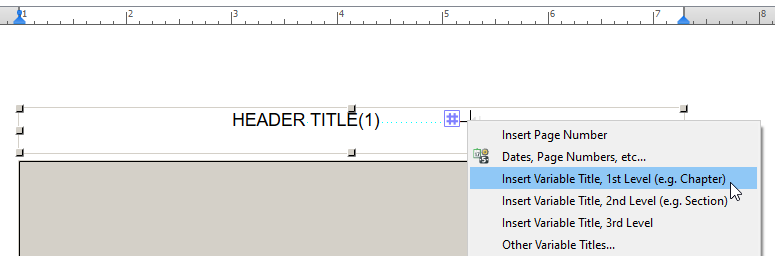
Inserting a variable title
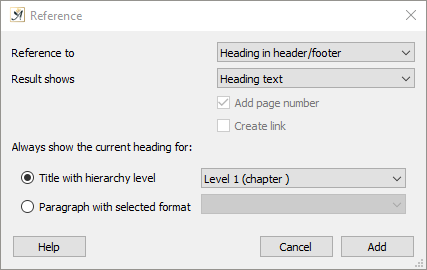
The Reference dialog
Alternatively, you can open the “Reference” dialog (in the “Insert” menu), choose the option “Heading in Header/Footer,” and choose the appropriate hierarchy level.
To find the correct hierarchy level, Papyrus Author uses the one that you enter as you create each heading (under “Style Template,” “Headings/Lists Tab”).
For unnumbered chapters, choose “Paragraph with selected format.”
The following is a list of the commands for the header/footer area, if you want to change them manually:
HEADERTITLE(Hierarchy Level)
Displays the name of the current heading including the hierarchy level number. If there is a heading on the current page, this will be used first. If there isn’t a heading, Papyrus Author will go back through the text searching for the last page with a heading, and if it finds one of the correct hierarchy level, it will be displayed in the header. If Papyrus only finds headings with a higher hierarchy level, or gets to the beginning of the text without finding anything, the header will remain empty.
HEADERTITLE(“name of the paragraph style template”)
You have the option to enter the name of the paragraph style template, which means only the paragraphs using this template–instead of all the paragraph style templates for the hierarchy level–will be used.
HEADERTEXT(Hierarchy Level), HEADERTEXT(“name of the paragraph style template”)
works like HEADERTITLE(), but the numbering will not appear.
HEADERNUM(Hierarchy Level), HEADERNUM(“name of the paragraph style template”)
works like HEADERTITLE(), but only the numbering will appear.
Managing Master Pages
The “Master Pages” dialog allows you to change the settings for all master pages used in your document.
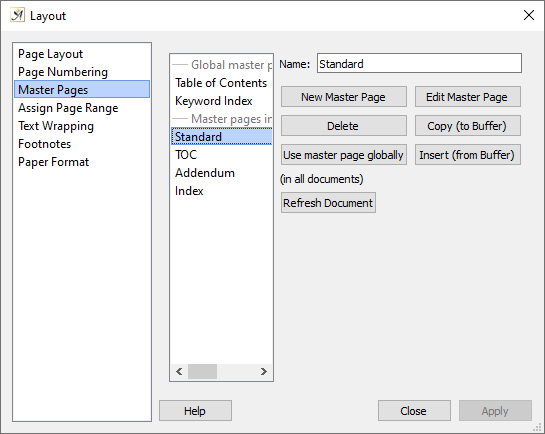
The Master Pages dialog
A master page can be re-named under “Name.” The new name will appear in the list when you hit ![]() .
.
“New Master Page” will create a new master page as a copy of the current master page.
You can only “delete” a master page when it is not being used in the current text.
“Edit Master Page” will bring you directly to that master page in your document so you can edit it.
With “Copy (to buffer)” and “Insert (from buffer)” you can use a “buffer” to exchange master pages between documents.
If you have a master page that you would like to use for many documents, you can select “Use master page globally.” A global master page will then appear in all your documents in the master page list.
Changes in a global master document will not immediately appear in all opened documents. If you just changed a global master page in another document and want to use it now in your current document, you can choose “Refresh Document.”
Global master pages are only saved when you save the current document or save your Preferences.
For some documents, it makes sense to create a separate master page for right pages and one for left pages.
Assigning a Page Range
In this dialog (directly under the “Master Pages” dialog) you will find the page range assignments valid for master pages within your document. Your document will be sorted numerically by all the pages assigned to a specific master page.
You can assign a page range to a master page by choosing the pages in “Page a to z” (“a” and “z” are the beginning and end of the range) and then choosing the master page in the drop-down menus next to it.
If you have selected the checkbox “double-sided document (right and left pages are different),” you can assign a page range separately for the front page “if right (odd)” and the back page “if left (even).”
Text that runs over the end of the page will only change to a different master page if you change the settings by “New pages.”
For example, if your master page is a letter, you could assign it a letter head that will only appear on the first page of the document; after the first page, the text will continue onto the second page without a new letterhead.
Text Wrapping (Avoiding Orphans and Widows)
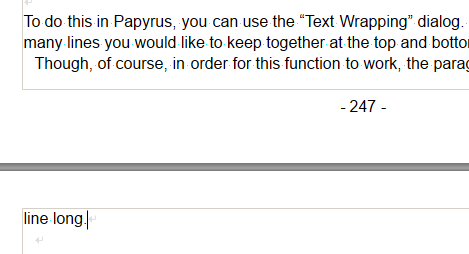
A widowed text line
Extra lines of text that are left dangling on the beginning or end of a page are known in typographical terms as “orphans” and “widows.”
A well-formatted text aims to avoid the occurrence of orphans and widows.
To do this in Papyrus Author, you can use the “Text Wrapping” dialog in the “Document” menu → “Page Layout.” You can tell Papyrus Author exactly how many lines you would like to keep together at the top and bottom of the page.
Though, of course, in order for this function to work, the paragraph needs to be more than one line long.
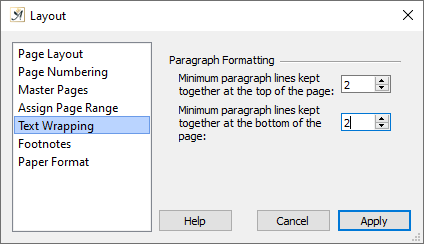
The text wrapping dialog
 on March 30, 2020