The Papyrus Author Text Window
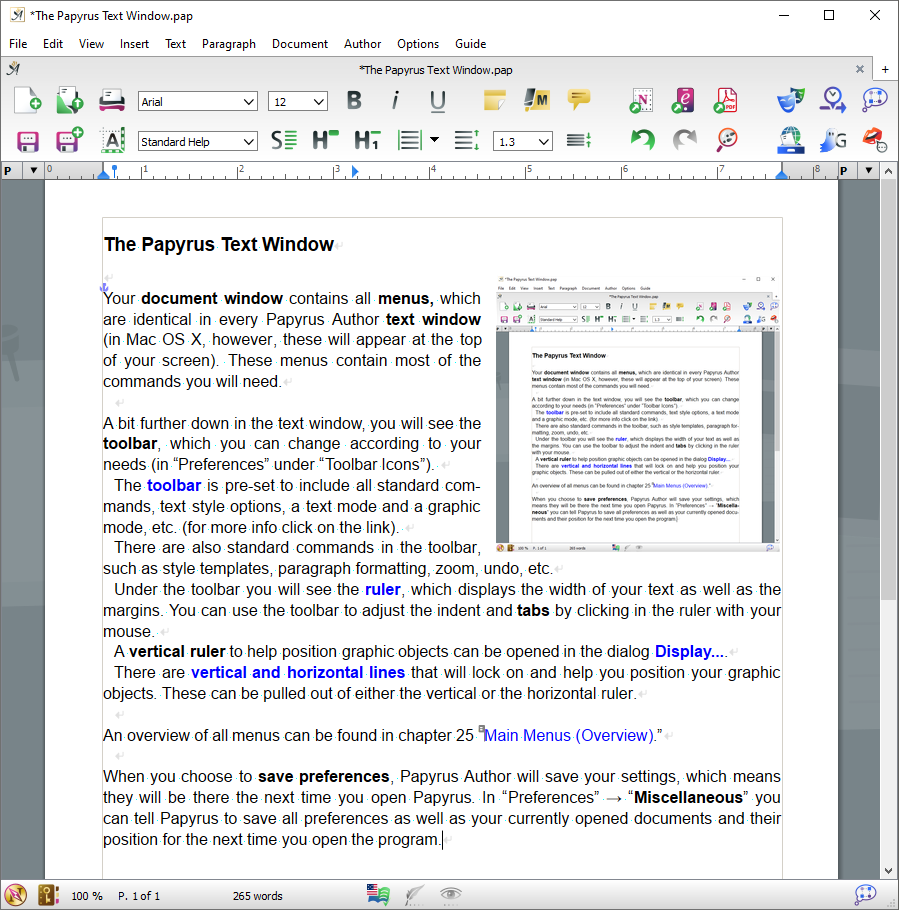
Your document window contains all menus, which are identical in every Papyrus Author text window (in Mac OS X, however, these will appear at the top of your screen). These menus contain most of the commands you will need.
A bit further down in the text window, you will see the toolbar, which you can change according to your needs (in “Preferences” under “Toolbar Icons”).
The toolbar is pre-set to include all standard commands, text style options, a text mode and a graphic mode, etc. (for more info click on the link).
There are also standard commands in the toolbar, such as style templates, paragraph formatting, zoom, undo, etc.
Under the toolbar you will see the ruler, which displays the width of your text as well as the margins. You can use the toolbar to adjust the indent and tabs by clicking in the ruler with your mouse.
A vertical ruler to help position graphic objects can be opened in the dialog Display….
There are vertical and horizontal lines that will lock on and help you position your graphic objects. These can be pulled out of either the vertical or the horizontal ruler.
When you choose to save preferences, your settings will be stored so that the next time you start Papyrus Author it will open as per your changes. In “Preferences” → “Miscellaneous” you can tell Papyrus Author to save all preferences as well as your currently opened documents and their position for the next time you open the program.
