
Table of Contents
Different types of texts have different paragraph formatting and text style requirements.
Headings have a larger line height and a larger, often bold, font. They can also be numbered.
The running text, on the other hand, is smaller, not bold, and the first line of a paragraph is often indented.
Having to apply these formats every time you want to change something is very time-consuming.
If you use the Papyrus Author styles, you don’t have to. Styles are a type of “mold” that you can cast once and use for your texts again and again.
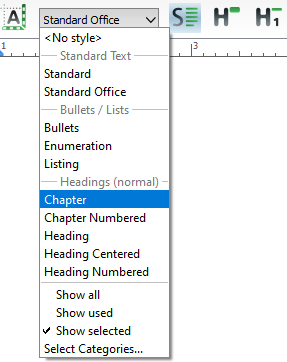
The list with pre-made styles
How to use a pre-made style: Select an area of text or place your cursor in the paragraph to which you would like to apply the style. Then select a style template in the drop-down menu of the toolbar and your text, either the paragraph or the selected area, will appear in this format.
This area of text will be assigned this style until you change it again.
Styles have two setting ranges:
First is the paragraph format, which includes the margins, alignments, line height, tabs, indention, and numbered or bulleted lists.
The style will also save the settings from the “Advanced Paragraph Formatting” dialog. These include additional settings for spacing above and below the paragraph, a setting to “start on new page” (useful for chapter headings), and other options, such as grouping lines so a page break does not interrupt a paragraph.
Second is the area for the text attributes. This includes settings for the font, size, bold, italics, etc. The name of a style that only includes text style and no paragraph formatting will be followed by the word “(text).” The running text which makes up most of your main text, will normally have the style “Standard.”
The Papyrus Author Predefined Styles
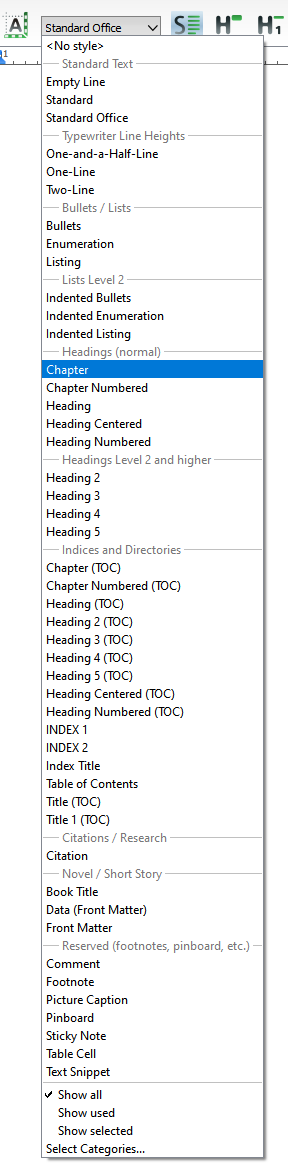
The list with pre-made styles
You can access all styles by clicking on the icon ![]() in the toolbar, which will open the Style dialog.
in the toolbar, which will open the Style dialog.
The templates for normal titles are “Heading” ![]() also for “Heading Centered,” numbered headings and “Chapter Heading” for books; or “Heading 1”
also for “Heading Centered,” numbered headings and “Chapter Heading” for books; or “Heading 1” ![]() through “Heading 4”
through “Heading 4” ![]() for office texts.
for office texts.
The style template for running text is “Standard” ![]() .
.
There are other icons for additional style templates:
You have an icon for “bullets” ![]() , which can be used for an unnumbered list. For a numbered list, you have the “numbered”
, which can be used for an unnumbered list. For a numbered list, you have the “numbered” ![]() icon.
icon.
A list of the icons available for style templates can be found in the dialog “Style → References.” Here you will also learn how to assign an icon to a style template you have created.
These are the “normal” style templates, which, for most writers, will be more than enough for a lifetime of writing.
However, there are more ready-made style templates that can be found at the bottom of the drop-down list.
In order to keep this drop-down list from becoming too disorderly, normally only the “selected” style templates are shown.
To see all the style templates, select “show all.”
Here are style templates for “single,” “one-and-a-half,” and “double” spacing. These are identical to those you will find in MS Word.
Additional style templates for lists can be found here, also with a second numbering level. You will find style templates for 4th and 5th level headings as well.
The rest of the style templates are normally invisible. They are used internally by Papyrus Author for pictures, tables, quotes, and the table of contents.
Chapter Heading and Running-Text Templates
Papyrus Author comes with a complete set of templates for headings.
You can find them under the style template drop-down menu in the toolbar (to the right of the icon for style templates ![]() ).
).
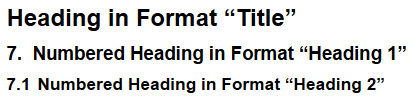
The heading styles
Simply place the cursor ![]() in your heading and select your choice of style template in the drop-down menu. This ensures that this text will be assigned the appropriate template permanently.
in your heading and select your choice of style template in the drop-down menu. This ensures that this text will be assigned the appropriate template permanently.
There is the icon for “Title” without numbers ![]() , those for headings numbered hierarchically: “Heading 1”
, those for headings numbered hierarchically: “Heading 1” ![]() through “Heading 4”
through “Heading 4” ![]() (used for non-fiction and academic texts) as well as “Standard”
(used for non-fiction and academic texts) as well as “Standard” ![]() , which gives you normal running text and much more.
, which gives you normal running text and much more.
If you use these templates, Papyrus Author is all set to create a table of contents for you automatically.
Different Headings
Style Template Categories
You can decide which styles should be shown
To help you find what you are looking for, we have organized the styles into categories. You can decide which styles you would like to see in the drop-down menu located in the toolbar.
These categories can be shown or hidden, depending on how many you would like to see in this drop-down menu. Individual styles can also be hidden.
There is an additional dialog (under “Select Categories…” at the bottom of the drop-down menu), where you can set which categories and styles you would like to see.
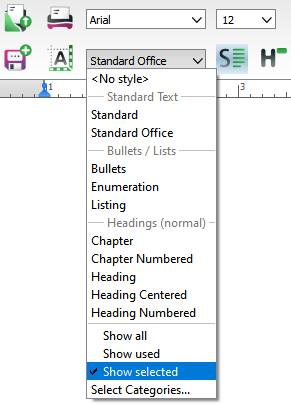
In both the drop-down menu for styles and the Style dialog itself, you can choose whether you would like to see only the selected styles, only those you have used or all styles.
Styles can be added to a category in the “Style” dialog in the “References” tab.
The settings to determine which styles will be shown globally throughout Papyrus Author, and under which category they will appear, can be selected in the “Style” dialog in the “References” dialog by selecting the “Category” button.
The styles that have been used in your text will always be displayed in the toolbar drop-down menu.
All of these settings are specific to the document you are currently working on. It is possible, though, to take the style templates and apply them in a new document. More about that in the next sub-chapter.
The style template categories
Your Own Style Templates
Not quite finding what you want in Papyrus Author’s styles?
No problem, with Papyrus Author you can create your own style templates for how you want your paragraphs to look.
Choose your paragraph settings according to how your text should look later, as described in the article for “Paragraph Formatting.”
If you wish, you can also define the text style.
The formatting for a certain style can be set in the “Style” dialog, which can be accessed via the ![]() icon or in the “Paragraph” menu. This dialog shows you the settings for the current style.
icon or in the “Paragraph” menu. This dialog shows you the settings for the current style.
The Style dialog shows all information for a used template
Paragraph formatting can include everything you see in the toolbar as well as the ruler above the text. This includes the margins, the line height, the text alignment (justified, left-aligned, …), as well as the tabs, which are the jumping points for the tab key ![]() .
.
Additional settings can be found in the dialog for “Advanced Paragraph Formatting”, also accessible in the “Paragraph” menu.
The style templates also include text style (font, size, style options such as bold, italics etc., text color, character spacing, language, and hyphenation).
Papyrus Author differentiates between a style template that is only to be used for the current document and one that can be used system-wide, called “global.”
These “universal paragraph templates” are stored in Papyrus Author not only just for the current text, but are “ ![]() available in all Papyrus Author documents”.
available in all Papyrus Author documents”.
Page 2 of this dialog is designed for experts who want to use more than the pre-defined styles available. Here you can tell Papyrus Author whether the style template is a heading and should thus be displayed in the table of contents and the Navigator.
A conflict can arise when two styles have been given the same name, but do not actually contain the same formatting. Conflicting styles with the same name will be shown in the drop-down window with a [<number>] after the name (this can happen by copying and pasting between documents).
If a template in the document currently opened has the same name as a global style but contains different formatting, it will be marked in the styles pop-up with “(local)” after the style’s name.
Settings and Properties of Style Templates
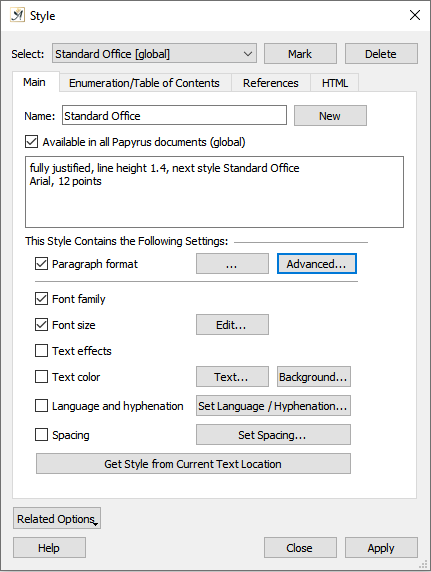
The main section of the “Style dialog” (accessible via the ![]() Icon and in the “Paragraph” menu) allows you to see the properties of any style template used in selected text. Here you can also change settings, give style templates a name of your choice, and create new style templates.
Icon and in the “Paragraph” menu) allows you to see the properties of any style template used in selected text. Here you can also change settings, give style templates a name of your choice, and create new style templates.
The Style dialog is also where you format templates yourself
Style templates contain information about the paragraph formatting (text alignment, margins, line height, etc.) as well as the text style (font, size, etc.).
Whether the paragraph formatting will be included depends on whether you have selected the checkbox “ ![]() Paragraph format.” If so, these settings will be saved in your style template.
Paragraph format.” If so, these settings will be saved in your style template.
“ ![]() Font family,” “
Font family,” “ ![]() Font size,” etc. determine whether these parameters should be saved in your style template. If a style template consists only of text style elements without paragraph formatting, this will be indicated in the Style Template drop-down menu in the toolbar
Font size,” etc. determine whether these parameters should be saved in your style template. If a style template consists only of text style elements without paragraph formatting, this will be indicated in the Style Template drop-down menu in the toolbar ![]()
![]() with “(text)” following the name of the style template.
with “(text)” following the name of the style template.
The values for the paragraph format come directly from the current paragraph. This allows you to take this formatting and save it in a style template. Additional settings can be found in the “Advanced Paragraph Formatting” dialog, which you can access from this dialog by clicking on “Advanced.”
The text style can be changed by accessing the corresponding dialogs. Clicking on “Edit” will open the “Font Panel” dialog. There are also settings for “Color,” “Language and Hyphenation,” as well as “Spacing.”
Clicking on the button “Get Style from Current Text Location” will take all style settings from the text where your cursor is currently located.
All parameters for your style template will be shown in the parameter box in the dialog.
With the “New” button, you can create a new style template.
“Global paragraph formats” are “ ![]() Available in all Papyrus documents (global).” All other formats are only available in the text you are currently working on.
Available in all Papyrus documents (global).” All other formats are only available in the text you are currently working on.
The “Mark” button will select discontinuous blocks of text that all share the same style template. This allows you to edit these places in your text without having to find them all individually.
The “Related Options” button will bring you to the related dialogs “Style Template Categories,” “Document Statistics,” and “Keyboard Shortcuts…”
The “Keyboard Shortcuts” allow you to assign a shortcut to your style template, so you can apply it without ever having to use your mouse.
Enumeration / Table of Contents
In this tab of the “Style” dialog you can access settings for style templates of headings and lists, e.g. changing the display of chapters.
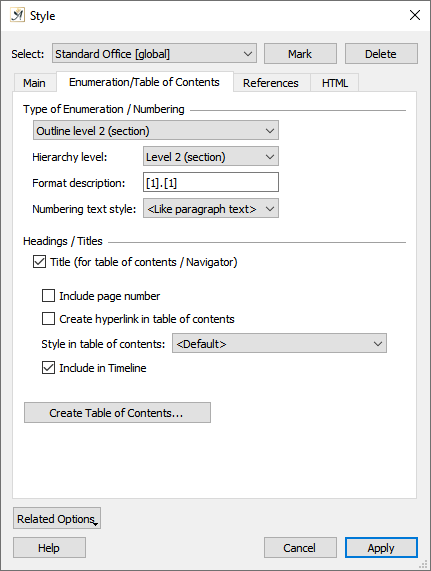
The Enumeration/Table of Contents tab of the Style dialog
In the “Format description” line of this dialog you can enter style template characters as a prefix. These characters can also be numbers (for example, for numbered chapters, pictures, or tables).
You can also use special characters for lists and numbered lists, a hyphen “-,” or a “bullet.”
In the drop-down menu “Type of Enumeration / Numbering” there are already list formats for bullets, hyphens, numbers for up to three hierarchy levels, as well as picture and table captions.
With the drop-down entry “User-defined format” you can design a style template with your own countables (e.g. for additional numbered lists).
The hierarchy level determines how much a heading will be indented, for example the headings in the “Navigator” ![]() .
.
Under “Format Description” you can enter characters (hyphens, bullets, etc.) directly, also followed by a space if you like.
Numbers for the outline level are entered in brackets (“[1].[a]”). The first bracket contains the first outline level (a main chapter, for example); the second bracket for the second outline level (a sub-chapter), and so on.
The type of counter used will be determined by the character in the brackets. “1” stands for Arabic numerals, “A” for capital letters, “a” for lowercase letters, “I” for Roman numerals, and “i” for lower case Roman numerals.
Text before, after, or between the counters can be entered in the appropriate place of the “Format Description” line (with a space, decimal point, brackets, etc.).
This way, for example, you can change the preset style for chapters “1. Chapter” to “Chapter 1.” by entering “Chapter [1]:”.
Only the tabs must be entered in brackets (“[TAB]”). The brackets surrounding the TAB will not count as an outline level.
Brackets entered with a blank space “[ ]” mean that the counter will be counted, but won’t be displayed.
The numbering text attribute can be the same as or different to the text style in your document. To change it, use the drop-down menu “Numbering Text Style.” This allows you to use special characters that are not available in the font family you are writing with.
The counter can be reset by double-clicking on the number in your main text and using the dialog that pops up: “Set Numbering Values.”
Labeling a Style as a Heading and for the Table of Contents
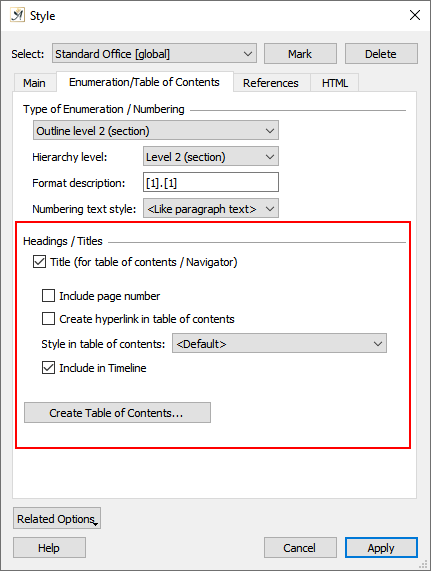
The dialog is also used for the creation of headings for a table of contents
In the lower part of the “Style” dialog and “Enumeration/Table of Contents” tab there is a checkbox “ ![]() Title (for table of contents/Navigator)” to define a style template as a heading.
Title (for table of contents/Navigator)” to define a style template as a heading.
All parts of your text that have been assigned this style template (normally headings) will appear in the table of contents and in the Navigator ![]() .
.
There is an option to “ ![]() Include page number.” Deselect this option if you are adding information into the table of contents without page numbers, or if you are working on an e-book, which never has page numbers.
Include page number.” Deselect this option if you are adding information into the table of contents without page numbers, or if you are working on an e-book, which never has page numbers.
“ ![]() Create hyperlink in table of contents” allows you to automatically create hyperlinks from the table of contents into your text, so chapters can easily be accessed on an e-reader or similar.
Create hyperlink in table of contents” allows you to automatically create hyperlinks from the table of contents into your text, so chapters can easily be accessed on an e-reader or similar.
The main headings in your text will likely appear larger and bolder than the rest of the text, but this shouldn’t be the case in the table of contents.
In this dialog, you have the option to assign a special style for your headings in the table of contents.
Papyrus Author can also choose a corresponding style from the templates included in the software (see “Special Template Documents for Indices and Directories”).
With the button “Create Table of Contents…” you can open the dialog in which you can create your table of contents.
“Style–References” Tab With Text Style and Icons
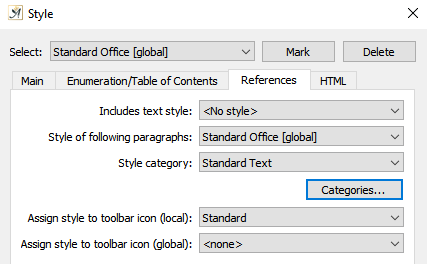
The References tab of the Style dialog for text styles of templates
In the “Reference” tab of the “Style” dialog you can assign a text style to your style template.
This allows you to assign the same text style to a variety of styles, even ones that do not yet contain text style, such as styles for paragraphs.
Normally, after you have finished a paragraph and have hit the return button ![]() , the next paragraph will use the same format as the paragraph before it.
, the next paragraph will use the same format as the paragraph before it.
For some styles, though, this doesn’t make much sense. Headings, for example, are normally not followed by another heading, but rather by running text. Here in this tab you can choose the style of the following paragraph.
Style templates can be assigned a category in this dialog.
Styles can also be assigned a toolbar icon. In the drop-down menu “Assign style template to toolbar icon,” you can choose which icon you would like to be used for your style (instead of the ones from the following table).
You can change the settings for which icons will appear in your toolbar under “Preferences” → “Appearance” → “Toolbar Icons.”
Default settings for icons and their assigned style templates (depending on the type of the document – book documents get standard book styles, office texts get standard office styles):
| Icon | Name of Style Template assigned to icon | Example |
| Bullets |
A bulleted list With multiple items |
|
| Numbered |
1. A numbered list 2. The items are numbered |
|
| “Standard” or “Standard Office” | Continuous running text, in books indented | |
| Heading | A Bold Heading |
|
| “Chapter Heading” or “Heading 1” | 1. Numbered Chapter |
|
| Heading 2 | 1.1 A Sub-Chapter (Level 2) |
|
| Heading 3 | 1.1.1 A Sub-Chapter (Level 3) |
|
| Heading 4 | 1.1.1.1 A Sub-Chapter (Level 4) |
|
| to |
||
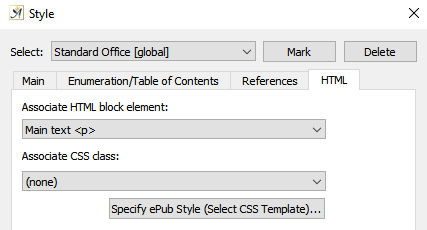
“Style Template–HTML” Tab With HTML-Export Settings
In this tab you can associate certain HTML block elements with your style template (headings, for example). When you export in HTML, these will then be used in each part of your text assigned that specific style template.
The HTML tab for HTML block elements
Reformatting to Target Styles From Other Documents
Not only can Papyrus Author turn your document into a format like editor pages, it can also reformat your text to look like any other text of your choice.
You can find this option under “File,” “Generate,” “Adopt Styles from Other Document.” From there you are free to choose your own document or one from Papyrus Author.
The format of the text you choose will be used to create a new version of your original document in a new window (your original will stay exactly as it is).
The text in the document you choose to use as a template will not appear in your new document. Only the formatting will be used to create a new document with the contents of your original document.
Using Style Templates from Other Documents
Once you have gone to the work of creating style templates to suit your needs, you will likely want to use them again in another document.
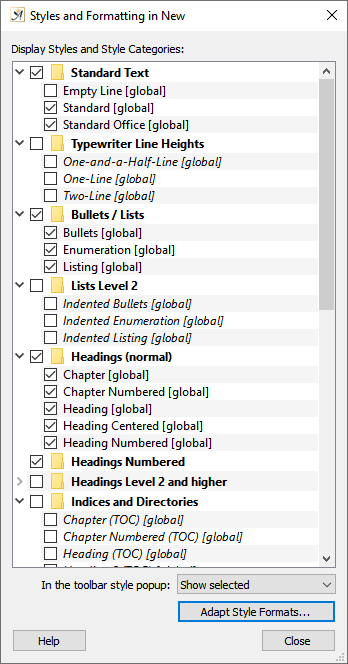
Adapting style formats from another document
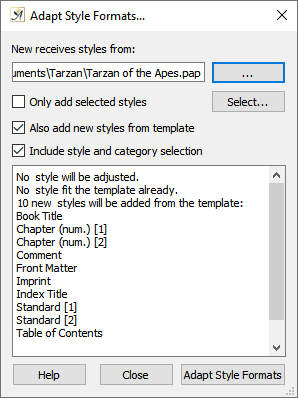
Papyrus Author has developed an option for styles that allows you to take the formatting from your current text and use it in another text.
To use this function, choose “Get Style From…” in the menu “Paragraph.”
First you need to select the document from which you would like to import the style template for your current document. After you have hit the “Select…” button, the “Choose Styles From…” dialog will appear.
You can choose to “Also add new styles from template” to be included in your new document. If you do not select this option, only the styles with the same name as those in the new document will be used.
Before you import anything, the dialog will show which styles will be adjusted and which will be added without changes.
There is an option to “Include style and category selection,” which determines whether the styles will appear in the drop-down menu of the toolbar and under which category.
Pressing the button “Adapt Style Formats” will then make the selected styles accessible in your document.
You can use styles from other Papyrus Author documents (*.pap), from Papyrus Author template documents (*.pav), as well as from Rich Text Format (*.RTF), and Microsoft Word (*.DOC and *.docx) templates.
If you would like to use all your styles in a new document, you can simply choose the option “New Document with Current Layout” (under “File” → “Open Other”). A new document will then be created with the layout of the text you are currently working on.
More Information About Automatic Reformatting
A few words about reformatting your document in Papyrus Author:
- Index entries, footnotes, the entries under “Document” → “Author etc.” (Title, Author, Email Address, etc.) will still be there in the new reformatted version of your document.
- If you have used a universal style (one that is applied to all documents) in your original document, the different looking styles of the same name will appear as “Stylename [local].” The same goes for other styles that you use as a template for the formatting of your new document.
The “local” after the style name means that the same paragraph style exists with the same name a second time. However, in this document the local format is used as a template for the reformatting of your original text. - If you import new text into a document that you have already changed into standard pages, it’s important to choose the standard page style template for the new section of text. This way your entire text stays formatted as standard pages.
Another way to do this is to simply reformat the entire document in standard pages once again.
 on March 31, 2020