
Table of Contents
Build mindmaps and brainstorm your book with the Thinkboard. Create idea bubbles, notes, and characters, link them together with lines or arrows, and use what you’ve created to generate new chapters. Going one step further than a conventional mind map, create chapters and content directly by dropping your Thinkboard elements into your document.
Your idea “bubbles” can be moved around, linked and grouped. Customization of every element is available so you can distinguish different types of ideas, for example between plotlines and chapters, characters and general notes.
You can mark all of the ideas that belong together and create an “idea group” (“group” for short) out of them. These groups can also be given a title.
Events, scenes, and chapters can be created in the Thinkboard. When you drag Thinkboard elements into your text, the events, scenes and chapters will be created automatically from the content in your idea box in the Thinkboard.
Dragging items from the Thinkboard to the Navigator will create a link so you can jump from the idea in the Navigator to the Thinkboard and vice versa.
The Thinkboard Display
Use the icons ![]() and
and ![]() on the left of the bottom toolbar to zoom in and out or
on the left of the bottom toolbar to zoom in and out or ![]() to reset. You can also use the keyboard shortcuts Ctrl+↑ to zoom in and Ctrl+↓ to zoom out. To view your entire Thinkboard at once, simply hold down the Alt key and left-click on the “magnify 100” icon [Alt +
to reset. You can also use the keyboard shortcuts Ctrl+↑ to zoom in and Ctrl+↓ to zoom out. To view your entire Thinkboard at once, simply hold down the Alt key and left-click on the “magnify 100” icon [Alt +![]() ].
].
You can create links between your Thinkboard and the Navigator. A click on a Thinkboard link in the Navigator will take you to that spot on your Thinkboard.
The Thinkboard icon is in the bottom right of your Papyrus Author window
To do this, you need to display the Navigator in the Thinkboard. Just like in the main text, you click on the compass symbol ![]() , which is displayed on the bottom left of the window.
, which is displayed on the bottom left of the window.
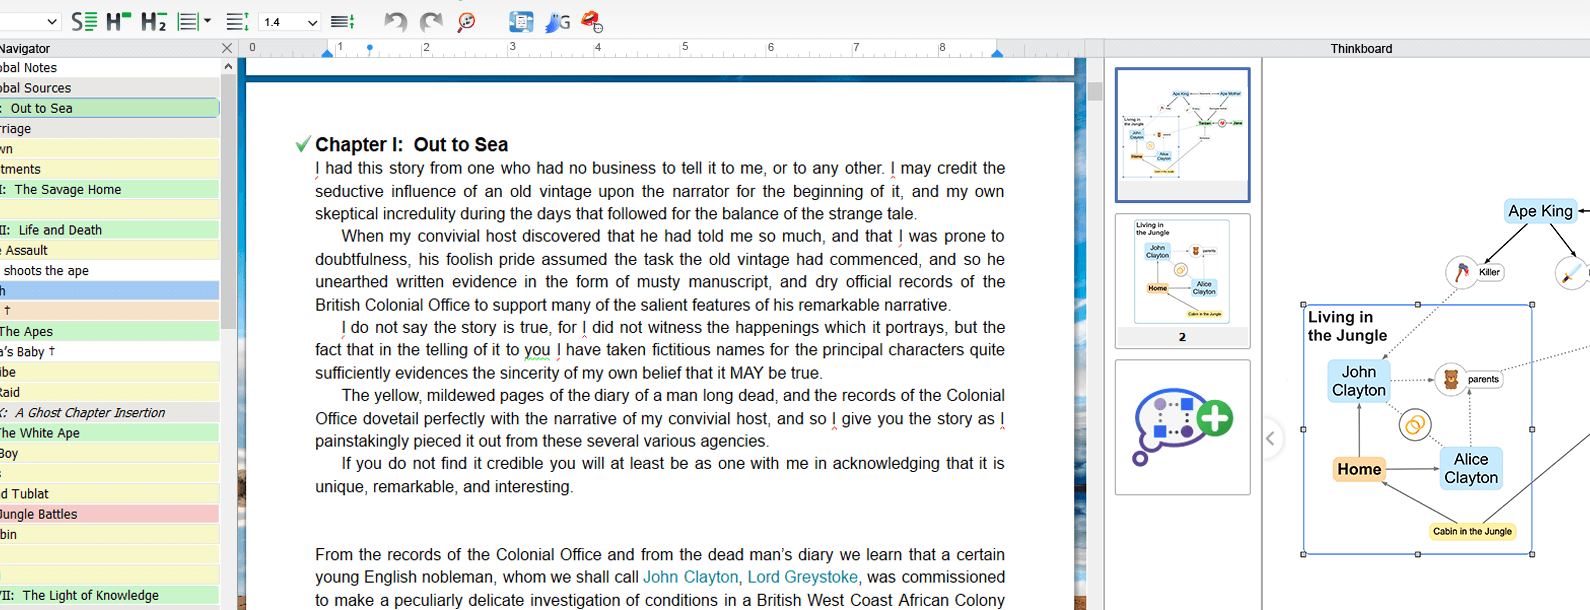
You have the option of splitting your workspace so you can see the Thinkboard and main text at the same time. This is especially useful when you want to use your Thinkboard for creating new content.
To split your work space, click on the Thinkboard Icon ![]() , on the bottom right of the status bar in your text window.
, on the bottom right of the status bar in your text window.
The Thinkboard will then replace the Pinboard on the right of the window. You can move the dividing line between the Thinkboard and the main text to make some Pinboard space available again.
Creating A Thinkboard
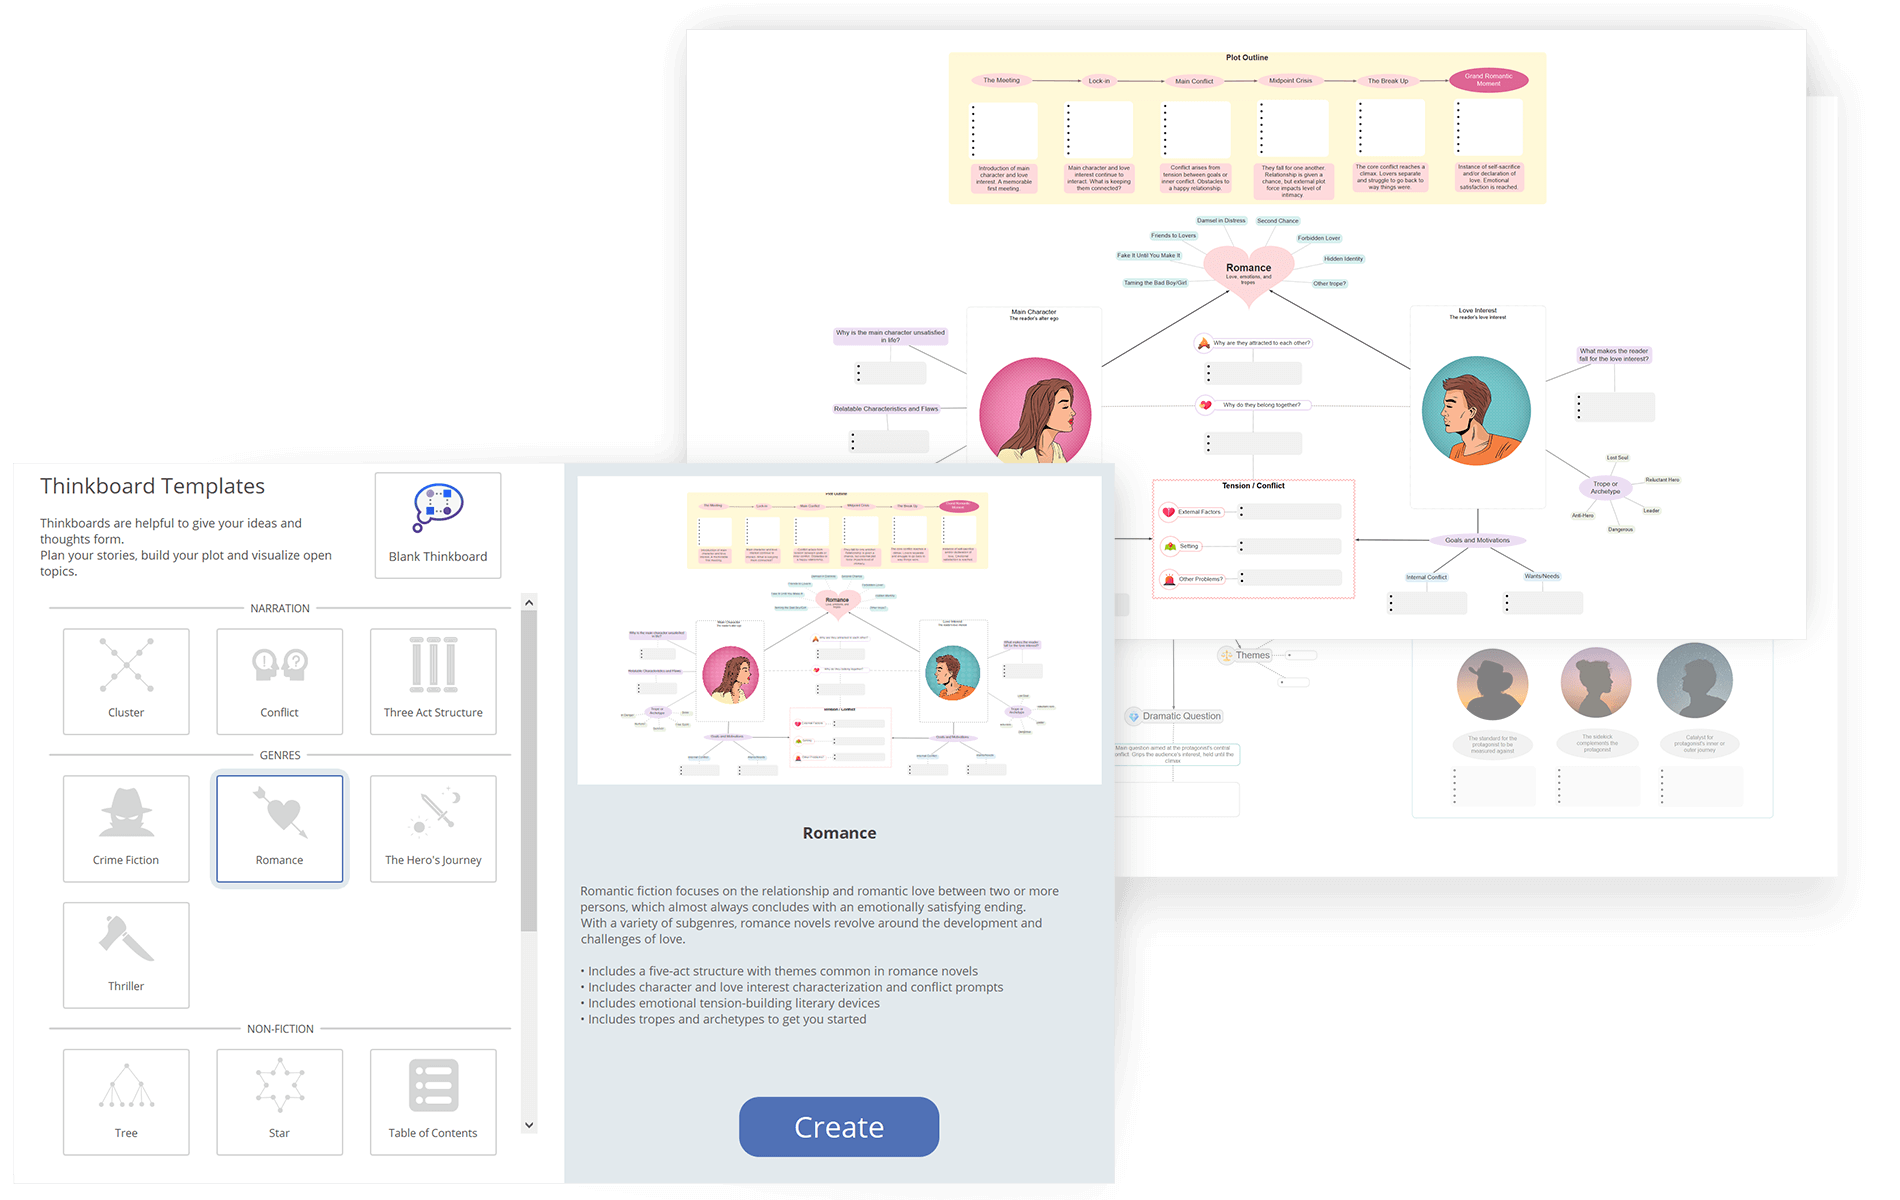
Start from scratch, or use a template.
Every document starts with a blank Thinkboard. When you first open the Thinkboard–whether in a separate tab or in the side-pane, the left-hand side will show Thinkboards associated with this document.
You can begin immediately to build your ideas in the blank Thinkboard provided, or you can choose to use one of the pre-made Thinkboard Templates.
To create a Thinkboard, click on New Thinkboard icon ![]() .You can also right click in the Thumbnail display and select “Insert New” from the context menu. This will open the Thinkboard creation dialogue.
.You can also right click in the Thumbnail display and select “Insert New” from the context menu. This will open the Thinkboard creation dialogue.
After selecting which type you wish to create, the Thinkboard will open in the separate tab view.
Building Your Structure
Whether you’re editing a template or building your own mind map, you can add, edit, move and link whatever ideas you want.
Creating New Ideas
Generate a new idea “bubble” by double-clicking anywhere in the blank space of the Thinkboard.
To copy a bubble, select it then hold down the ![]() key (Mac:
key (Mac: ![]() ) whilst dragging the bubble away. A new bubble will be created.
) whilst dragging the bubble away. A new bubble will be created.
Idea boxes will stretch sideways as you type and will eventually wrap the text around. However, if you want to change the width of the bubble, you can manually adjust it by clicking on the bubble border and use the resize marker to drag it to the size you want. Once you let go with your mouse, the width will be set for that bubble, unless you manually adjust it again. The height is always determined by the number of text lines. See also Sharing Ideas Between Thinkboards.
Editing and Moving Elements
Idea boxes can be moved wherever you choose by dragging and dropping with your mouse.
The context menu![]() contains options to change the look of your idea bubbles.
contains options to change the look of your idea bubbles.
You can change everything from the font style and size, to the text alignment, bubble color and shape.
To delete the entire bubble you can highlight it and either press the delete key or right click and select “Delete” from the context menu.
If you want to delete only the contents of the bubble, but keep the bubble itself, right click on it and select “Delete Content”.
Create and manage styles.
To save the design of a particular bubble style, open the context menu ![]() and click on “Style” → “Create from Selected Item.” In the dialogue assign a name. Once saved, this style becomes a template and can be instantly applied to any other bubble.
and click on “Style” → “Create from Selected Item.” In the dialogue assign a name. Once saved, this style becomes a template and can be instantly applied to any other bubble.
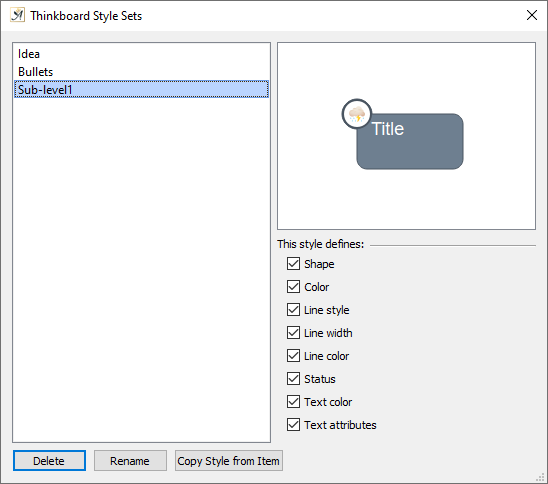
To see what bubble styles you have created, open the Thinkboard Style Sets dialogue by clicking “Style” → “Manage Styles…” in the context menu. Here you will see a thumbnail image of the bubble style and can select or deselect the attributes which it will define.
You can also copy an existing style to create a new one. If you are creating a similar style and only changing one or two attributes, this makes it quick and easy.
Move any element by dragging and dropping it with your mouse. To move multiple elements together, first select them all–either by using the mouse to draw a box around them or holding down the Ctrl key–and clicking on each element.
The Grid
In the bottom toolbar is a scale which will place a grid over the Thinkboard.
Choose the size of the grid you would like to work with by moving the slider.
There is also an option to change where the elements “snap”, to either the top left corner or the center of the grid squares with the “Snapping” tool ![]() . This can be helpful for positioning and organizing your Thinkboard objects.
. This can be helpful for positioning and organizing your Thinkboard objects.
Linking Ideas
The Thinkboard elements can be linked together by either connectors (lines or arrows) or by grouping.
Connectors
Different connector styles
To connect one bubble with another, click on one and drag it towards the center of the bubble you want to connect it with. A line will appear connecting the bubbles together.
It is only possible to connect two bubbles together with a single connector.
The style of the connector can be changed (e.g. to an arrow, dashed or dotted, etc.) by right clicking on the line and selecting the relevant option from the context menu. You can also change the width and color.
 When linking two bubbles, you can automatically create the line as an arrow. To do this, after the linking line is created, before you let go with the mouse, press the shift key on your keyboard. An arrow will automatically be created in the direction that you dragged and dropped. To create an arrow in the other direction, follow the same steps using the
 ![]() key (Mac:
key (Mac: ![]() ) instead of shift.
) instead of shift.
 The important point to remember is to keep the shift or Alt key held down until you have released the box with the mouse, otherwise the arrow will revert to a normal line.
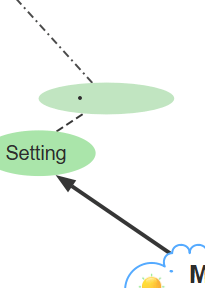
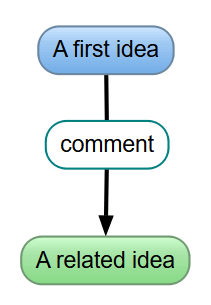
By double-clicking on a line you can create a new bubble that splits the line into two and creates a small box in between.
Individual connectors can be deleted by clicking on it and pressing “Delete” on your keyboard or selecting “Delete Line” from the context menu.
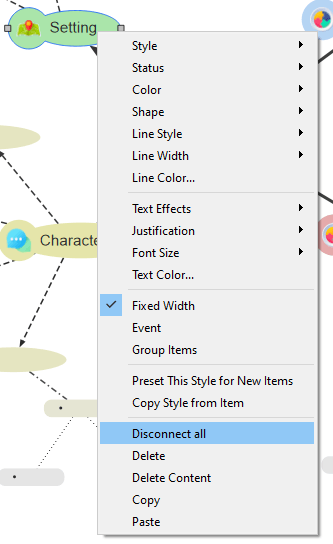
You can also delete all the connectors from one bubble in one step. To do this, highlight the bubble and right click to open the context menu. Select “Disconnect all”.
Grouping and Stacking Ideas
 The purpose of the Thinkboard is to let your ideas connect and build on each other. Whether it’s to help you form the plot or to directly create real text from them and make progress on your story, the Thinkboard can provide the structure you need.
While some ideas will flow from others, making a connector the ideal way of linking them, others will naturally closely associate together. For these, it can be more helpful to organize them into groups.
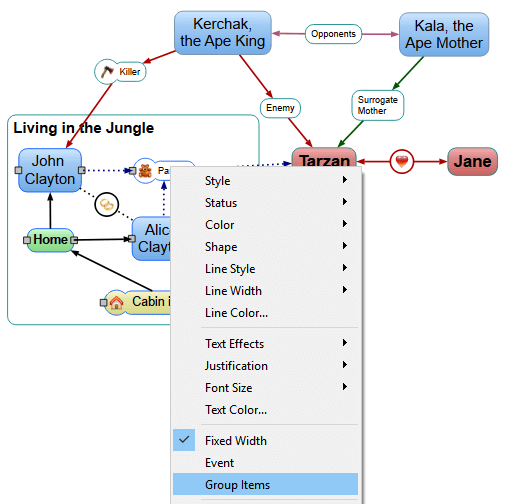
To do this, select the idea bubbles that belong together by holding down ![]() (Mac:
(Mac: ![]() ) and clicking
) and clicking ![]() on them. Alternatively, you can use the mouse to select the bubbles. Once selected, right-click with the mouse to open the context menu and then “Group Items”.
on them. Alternatively, you can use the mouse to select the bubbles. Once selected, right-click with the mouse to open the context menu and then “Group Items”.
Each group you create can be given a name. If you drag the group into your document to create text, this group name will be used as the chapter title.
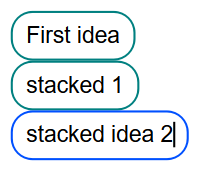
Alternatively, you can create a stack of ideas that belong together. These may be ideas which are not as closely associated as grouped items. To create a stack, click on an idea bubble and press ![]() +
+ ![]() (Mac:
(Mac: ![]() +
+ ![]() .) Directly under that bubble, a new box will attach itself. It will automatically adopt the same style as the original bubble.
.) Directly under that bubble, a new box will attach itself. It will automatically adopt the same style as the original bubble.
You can repeat this as often as you like to create lists or “stacks” of ideas.
Grouped items will always be moved together, unless you specifically select an individual bubble (or bubbles) from within the group. To move stacked items–or separately selected individual bubbles–together, you must first select each bubble to be moved. Either use the mouse to select the individual bubbles or hold down the Ctrl key and click on each one. Once they are highlighted, you can pick them up and move them together.
Idea Status–A picture says a thousand words

Select a picture to represent a status of your idea bubbles and groups. You can have a picture for the different emotions and actions in your story.
To add a status to your bubble, right click on it to open the context menu. Statuses can be attached to bubbles, groups as well as connectors.
The context menu also contains the option for large or small status icons.
Inserting Thinkboard Ideas into your Document
There are several options for how you can use your Thinkboard ideas within your main text document.
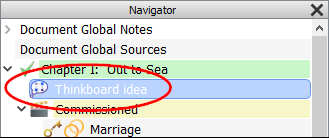 Firstly, as a point of reference, you can drag and drop
 ![]() a group or an idea into a title, scene, comment or event directly into the Navigator. This will create a link to that section of your Thinkboard. A double-click on the entry in the Navigator will take you to the right place in the Thinkboard where you can see the origin of your idea.
a group or an idea into a title, scene, comment or event directly into the Navigator. This will create a link to that section of your Thinkboard. A double-click on the entry in the Navigator will take you to the right place in the Thinkboard where you can see the origin of your idea.
You can add as many links as you want.
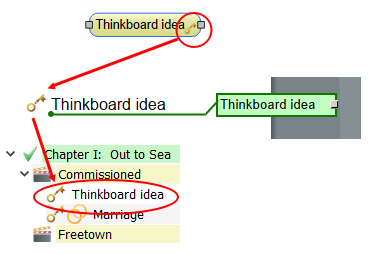
Ideas marked as “Events” in the Thinkboard will be inserted into the Navigator with the event icon.
 Entries in the Navigator can be deleted using the context menu. Once you delete a Navigator entry, the link to the Thinkboard will also be deleted.
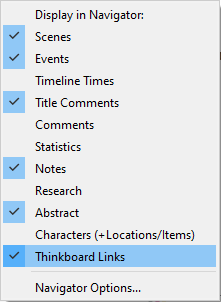
Show or hide the Thinkboard links in the Navigator via the “Navigator Display” options. To open, click in the status bar at the bottom of the window under the Navigator.
Creating Chapters, Text and Notes
The flexibility of the Thinkboard means you can do more than just create links to your ideas. You can also create chapters, text and notes within your document body.
 • Dragging
 ![]() a single idea bubble into the document will create a sticky note.
a single idea bubble into the document will create a sticky note.
However, if the idea has been marked as an “Event,” the bubble contents will be inserted into the document as text along with the “Event” icon and comment box. The “Event” will also be inserted into the relevant place in the Navigator.
• Stacked items or multiple individual ideas dragged and dropped together, will insert a single paragraph for each individual bubble.
• Dragging a group into the main text area will create a new chapter. The title of the group will become the title of the chapter. Unnamed groups will be titled “New Chapter.”
Each idea belonging to the group will become a paragraph within the new chapter. If you have nested subgroups within a group, these will become scenes in the new chapter.
• If you want a group to become a scene instead of a chapter, hold down the shift key ![]() +
+ ![]() when you drag and drop it into your text.
when you drag and drop it into your text.
Multiple Thinkboards
The Thinkboard has a multitude of uses–planning the outline for your entire book; planning specific chapters or scenes; general brainstorming, etc. You may use it for each of these purposes, or only one. Whatever your requirements, the option to create multiple Thinkboards allows you to develop and track your ideas at every level.
Create new Thinkboards by clicking on the ![]() button, or right click in the Thumbnail display and select “Insert New”.
button, or right click in the Thumbnail display and select “Insert New”.
The Thinkboard Display
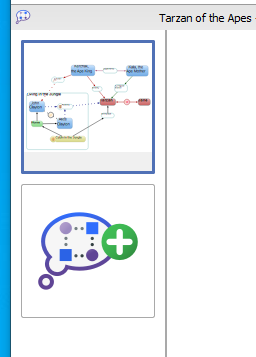
Beside the Thinkboard window–whether in the full tab view or side-pane–is the “Thumbnail” view. This contains an image for each Thinkboard you create.
Switch between each Thinkboard by clicking on the relevant thumbnail.
The Thinkboard thumbnail display in the main tab view and side-pane are independent of each other. This means, clicking on a particular Thinkboard in the side-pane view will not affect the focus of main tab Thinkboard and vice-versa.
Copying & Deleting Thinkboards
As well as being able to create new blank Thinkboards, or selecting a template, you can also copy existing ones. Simply right-click on the Thinkboard you wish to copy and select “Copy” or “Duplicate”.
Copy allows you to choose where in the list of Thinkboards you would like to create the new one.
Drag and drop the Thinkboard thumbnail to a new Thinkboard Duplicate will automatically insert the new one directly below the Thinkboard being copied.
Both options will open the new Thinkboard in the full tab view.
Another way to copy the entire Thinkboard diagram is to drag the relevant Thumbnail into another Thinkboard.
To delete a Thinkboard, right click on it and select “Delete”.
6.3 Sharing Ideas Between Thinkboards
You may want to copy certain elements from one Thinkboard to another, rather than the entire diagram. This is possible by highlighting the elements you wish to copy and dragging them into the relevant Thinkboard thumbnail.
 samuli on January 19, 2022