
Table of Contents
Above the text window you will find the toolbar filled with icons, each with its own function. In addition, you will find a variety of drop-down menus, many of which can change the appearance of your text (font style, font size, etc.).

A Papyrus Author toolbar
The Icons and Their Functions
In “Preferences” under “Toolbar Icons” you can configure your toolbar and choose which icons you would like to appear.
Standard Toolbar Icons


Special Function Icons


Special Function Icons in Papyrus Author Pro


![]()


Icons to Change the Text Style


Icons to Change the Paragraph Formatting


 –
– 

Other Icons


Standard Toolbar Icons
These commands can be found in almost every program that works with texts. First there is the icon for “New Document” . “Open Document” ( ), will open to the “File Selection” dialog. The “Print” icon, , will open the printer dialog.
There are icons to “Save” and “Save As” . If it is the first time you save a document, both will open the “File Selection” dialog. You can choose where to save the document also change the “file type” (e.g. “PDF” or “.docx”) in this dialog. If you click “Save As”, Papyrus Author will ask you which version, the original document or the new one you are now saving, should be displayed in the window you are currently viewing. If you have reached a milestone in your text, you can choose to save an “Important Backup” .
A special icon for saving is the icon, which allows you to export your document as a PDF. The icon exports your document in an e-book format, either ePub, MOBI or HTML.
There are icons for reverting to the last version of your text  ; for inserting a link
  or a reference
  ; as well as an icon to go to a specific page .
Special Function Icons
The icon will open the “Table Dialog,” in which you can create, change, and configure Papyrus Author tables directly on top of your text page.
The Papyrus Author Global Notepad can be opened with the icon.
 After clicking on the icon for the graphic object toolbar (
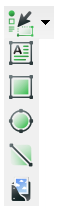
  ), a mini-dialog will pop up that offers you buttons to choose between text mode and graphic mode, as well as the option to create a new graphic object. There are buttons to add a new object of your choice: text box, rectangle, line, circle, or import a picture. You can see an example of the graphic object toolbar on the right.
If you choose, you can also display these icons ( ) individually in the toolbar.
The Navigator dialog, in which you can see your outline, can be accessed with the icon.
You can turn the option to track changes on and off with the icon.
Publishers prefer to receive manuscripts in “standard pages.” To format your document with these “Editor-friendly” pages, use the  icon.
icon.
Comments can be added in the context menu or with the icon.
Additionally in Papyrus Author Pro, you can find these options:
With you can access “My Research” where you can store all your research information. It is connected to your Papyrus Author project. You can import research information and images directly from your browser.
The theater mask icon opens “My Characters”.
The option to fade out everything but the direct speech in your text can be accessed with the icon.
The Timeline can be accessed with , and to get to the “Thinkboard” you can click on ![]() . For the Organizer, click the icon.
. For the Organizer, click the icon.
You can hide rough drafts, background information, and large text passages you don’t want others to see with the Ghost icon.
Other Icons
Use the “mode” buttons (  ) to change your working mode: The text mode button ( cursor) represents the mode you can write and manipulate text in. The Graphic Mode () is used for moving and manipulating graphic objects.
Typewriter mode will keep your cursor in the center of the screen.
You can enter full-screen mode by clicking on ; Or “distraction free” mode with the icon. Pressing the escape key ![]() will then exit from either mode.
will then exit from either mode.
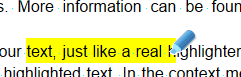
Highlighted text
The highlighter icons ( 

 ) can be used to highlight your text, just like a real highlighter, except in Papyrus Author you can also write a comment about your highlighted text. In the context menu you can open the “Highlighter/Comment” dialog.
Notes are useful for organizing extra information; you can open a new note by clicking on the icon.
Under “Preferences” → “Appearance” → “Toolbar Icons” you can customize your toolbar. The options include multiple highlighter and sticky note colors.

If you want to view two pages of your text side-by-side (“Preferences” → “Appearance” → “Display”), you can do this with the icon.
Use to see a “centered display,” and  to see your document left aligned.
The magnifying glass icon  allows you to zoom in on a specific area of your text. In the Zoom Popup you can access pre-defined zoom settings (these can be changed in the Zoom dialog located in “Preferences”).
The two arrow buttons  in the toolbar can be used to undo and redo (multiple times if necessary). One click on the relevant button will undo or redo your previous action. You can also display the “Last Operation(s)” drop-down so you can undo or redo multiple steps at once.
Changing the Toolbar Icon Set
You can choose one of these sets in the context menu of the toolbar (right-click ![]() on free space in the toolbar).
on free space in the toolbar).
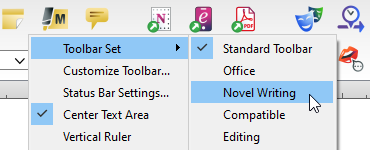
Choose a toolbar set in the context menu
The most important set, with a nice selection of icons, is the “Standard Toolbar.”
Then there is an icon set specialized for writing novels. These icons include:
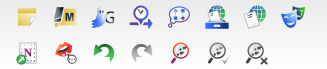
An icon set specialized for writing novels
Sticky notes, Comments, a text Highlighter, and Track Changes.
In Papyrus Author Pro you will also see the icons for The Thinkboard, My Research, My Characters, Ghost Text, and Direct Speech.
If you have office work to do in Papyrus Author, then you will want the “office” set. This contain the icons for tables, graphic objects, hyperlinks and references.
Changing the Toolbar Icons manually
You can customize your toolbar in the “Toolbar Icons” dialog found in Papyrus Author “Preferences”.
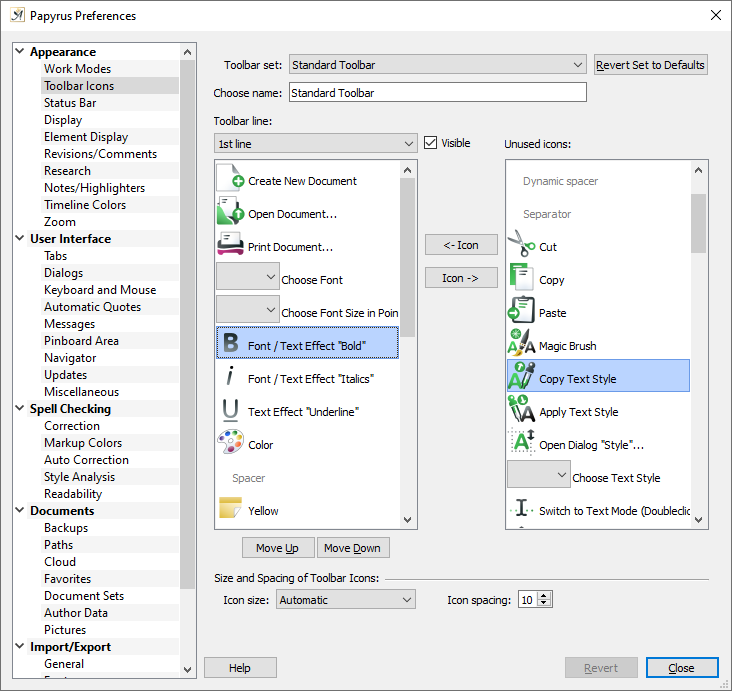
To insert icons into your toolbar, click on them in the right list and move them with the arrow button to the left list
There are four available “Toolbar Lines” that you can choose to assign icons to. Use the ” ![]() Visible” checkbox to include the line on the toolbar. The checkbox is always valid for the toolbar line that currently appears in the drop-down menu to the left.
Visible” checkbox to include the line on the toolbar. The checkbox is always valid for the toolbar line that currently appears in the drop-down menu to the left.
The list on the left will display all icons currently used in the toolbar line selected. On the right are the “unused icons” from which you can choose to add to your toolbar line.
With the two “Icon” buttons you can move a selected icon from the left to the right list and back.
“Move Up” and “Move Down” change the position of the selected icon in the toolbar line.
At the bottom of the dialog you can change the size and spacing of the icons.
Saving Your Toolbar Settings
If you have put a lot of effort into changing your toolbar settings or have created your own from scratch, you will of course want to save them.
In the “Miscellaneous” dialog (under “Preferences”) you can save some or all of your personal settings. This allows you to export the settings and use them on another computer or quickly access them after a Papyrus Author update.
 on September 4, 2020