
Table of Contents
Having believable, relatable characters can make the difference between a good story and a great one. Papyrus Author’s Character Sheets are editable profiles that store everything noteworthy about a character. Keep background info about characters, locations and items in dedicated sheets, which you can directly view from the text.
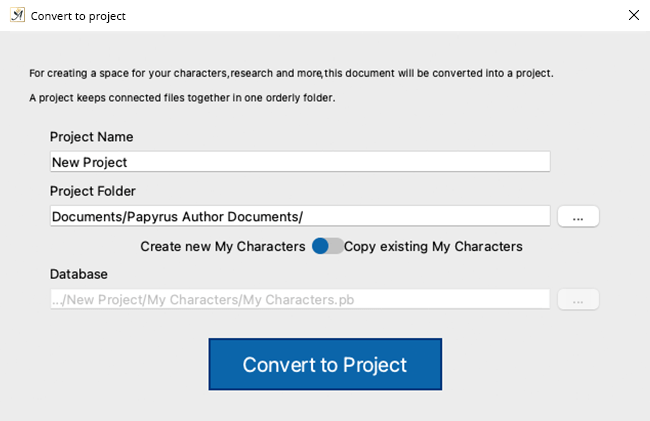
Select a name and location for your new writing project.
To create a new database, your document will need to be part of a “project”. You may have already started your manuscript this way, by choosing a template from the “Projects” tab of the Start Dialogue. If your document is not already part of a project when you click on the ![]() icon , or select “Link to table” from the context menu. You will be prompted to save your document as a project on your computer. Give the project a name and a destination where to save them.
icon , or select “Link to table” from the context menu. You will be prompted to save your document as a project on your computer. Give the project a name and a destination where to save them.
Character Sheets
Each Character Sheet contains 3 sections:
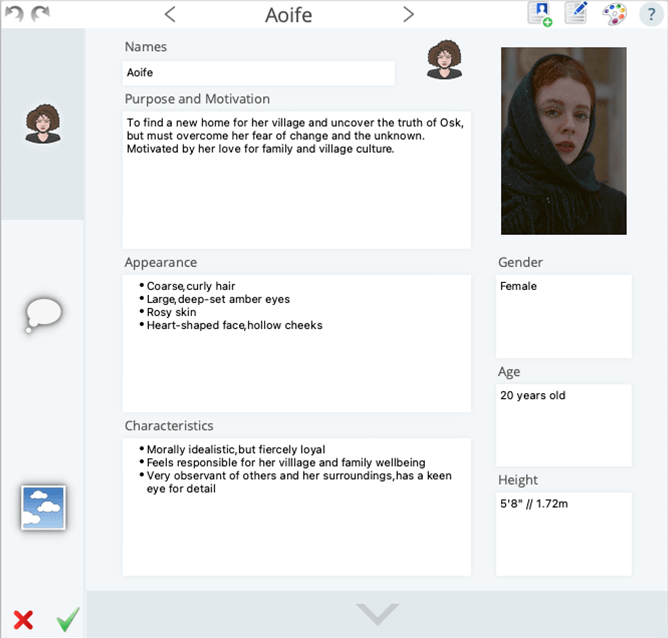
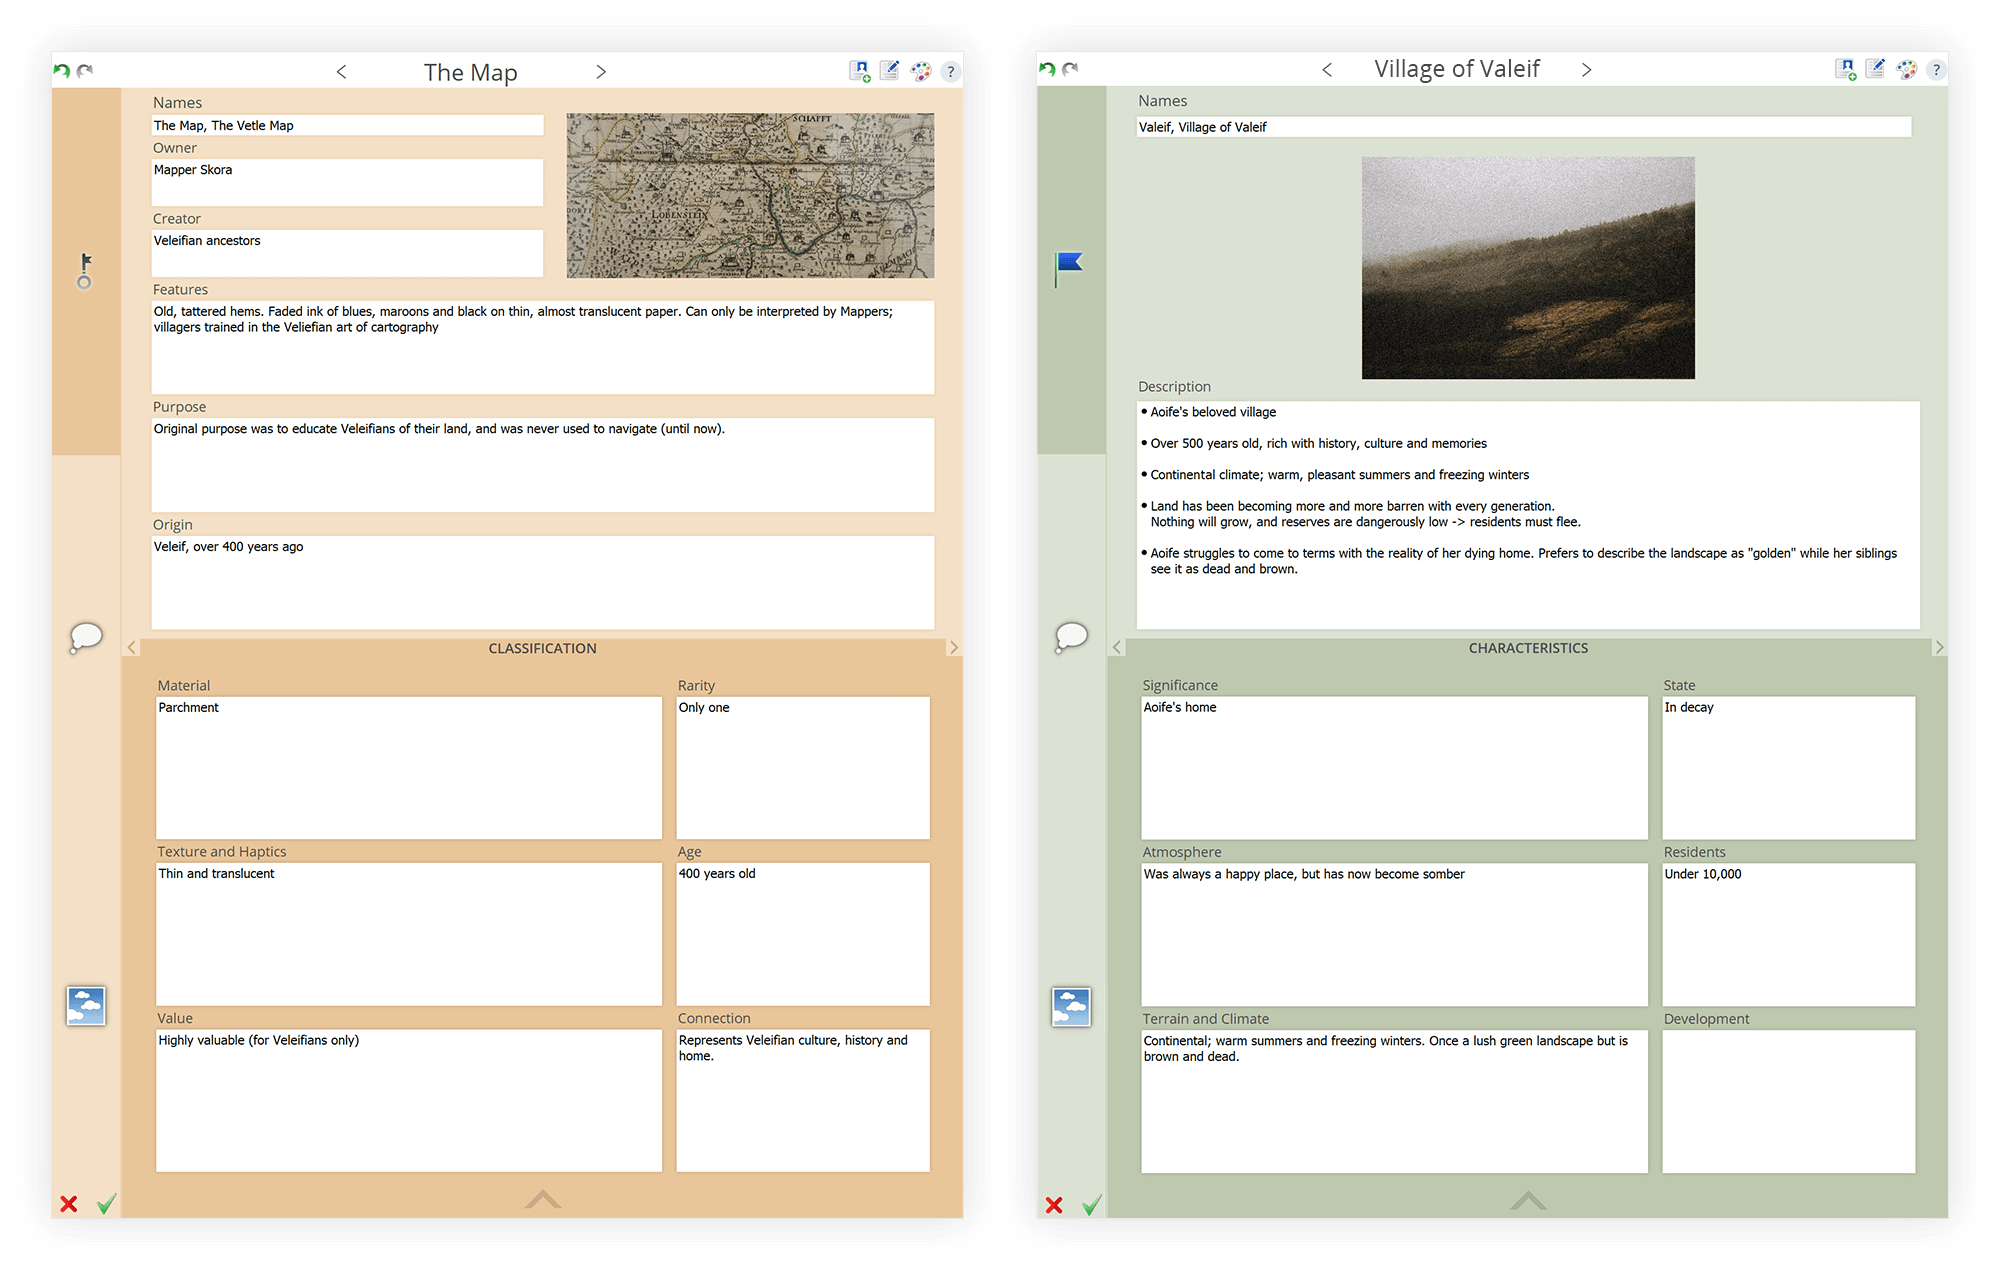
All details of your character in one place.
![]() Profile: This is the place to add your character details, for example, physical characteristics, background, family and friends. Click on the downward arrow icon
Profile: This is the place to add your character details, for example, physical characteristics, background, family and friends. Click on the downward arrow icon ![]() to expand the sheet to the full Character Sheet view.
to expand the sheet to the full Character Sheet view.
 Ideas: This is a free text area where you can make extra notes about your character. Maybe detailing plotlines or general character development.
 Gallery: The Gallery is your photo album of inspiring images or drafts of your character. simply drag and drop the pictures into the field.
Automatic Linking
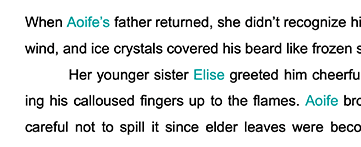
Text showing linked words in turquoise
A special feature of the database is that every record you create (character, place, thing), Papyrus Author will automatically link to the relevant places in your text where the linked word is used. You are not limited to only one word to link either.
For example, you have a character called John Smith. Sometimes he’s called “John”, sometimes “Johnny”, or maybe his friends call him “Jon”. All these combinations can be added to the character sheet to provide a link to the database record.
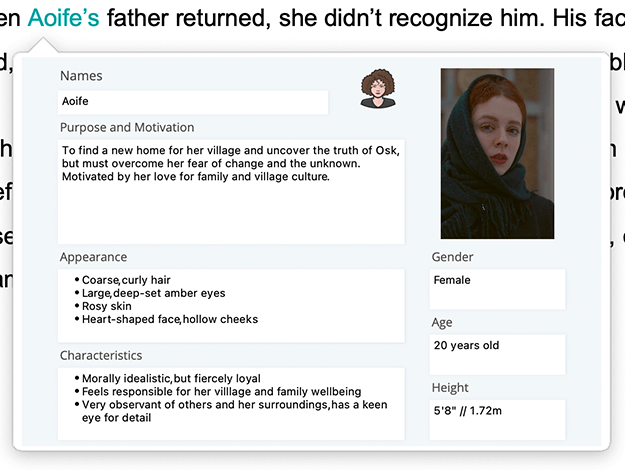
The character sheet in ‘hover’ view
The field also does not currently support special characters, for example “Dr. Smith” with the period would not create the automatic link. The sheet name will be shown as the first word in the list, if you enter more than one. When your mouse hovers over a linked word, a summary of the character sheet will be displayed. You can open the sheet to access all the fields either by double-clicking the linked word or by right-clicking on it, and selecting “Open Sheet” from the context menu. If you don’t want to see the hover view, it can be disabled under the View menu.
Creating New Sheets
There are several different ways of creating and editing Character Sheets. Depending on how you work, and which planning tools you are using, you can always access the Character Sheets.
From the document
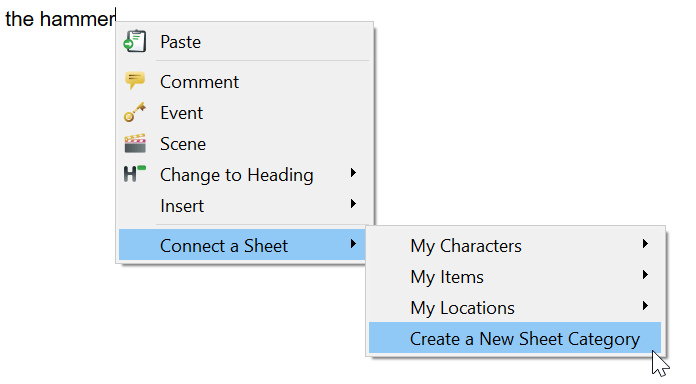
Create new Character Sheets directly from your text.
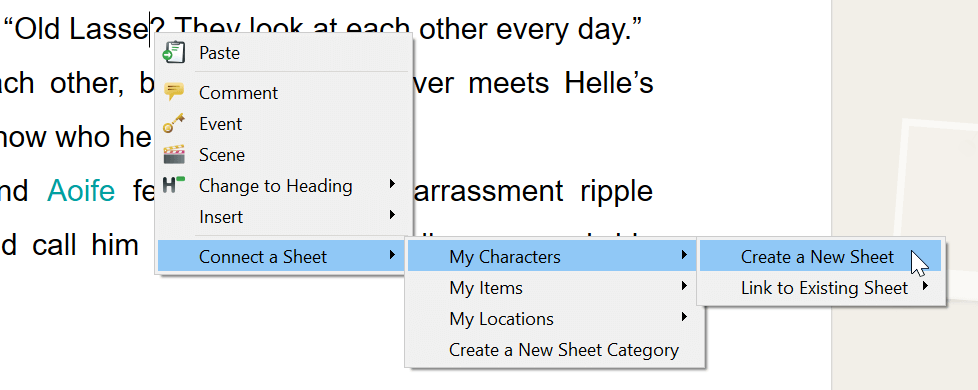
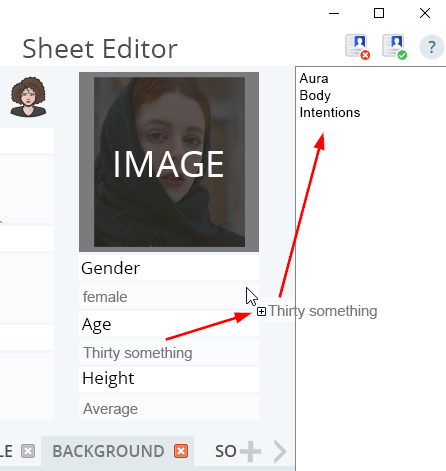
If you want to create your characters as you write, simply right-click on a name in your text, and select “Link to table” → “My Characters” → “Create a New Sheet”. The Character Sheet opens and the linked word will appear in the “Names” field at the top.
If your character has multiple names–or aliases–add these into the “Names” field, separating each one with a comma. You can save the record with just the linked name, or go ahead and add all the other information you want about your character. The sheet is formatted with an extended section and multiple tabs containing default fields. These can be customized–see “Editing the Form”.
From an Existing Sheet
Use the ![]() icon in the top of an open sheet to create a new one.
icon in the top of an open sheet to create a new one.
From the Navigator
 Also from within the document window, you have the Navigator Display. This is the section below the main Navigator pane which is opened and closed with the
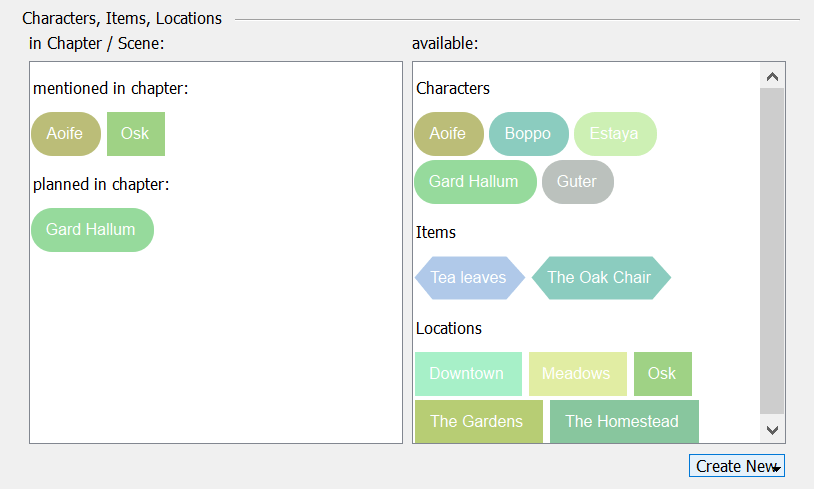
 ![]() icon. On the “Characters” tab the “Create New…” button will create new character sheets for you to complete. This could be for characters you haven’t yet written into the story, but plan to and want to note their details beforehand. Note that only the option to add records to the default tables are available in the Navigator. The “My Characters” tab will automatically appear in the Navigator Display. To add records to “My Places” and “My Things”, you will need to add these from the Navigator Display Options, so they show as separate tabs.
icon. On the “Characters” tab the “Create New…” button will create new character sheets for you to complete. This could be for characters you haven’t yet written into the story, but plan to and want to note their details beforehand. Note that only the option to add records to the default tables are available in the Navigator. The “My Characters” tab will automatically appear in the Navigator Display. To add records to “My Places” and “My Things”, you will need to add these from the Navigator Display Options, so they show as separate tabs.
Directly in the Database
If you like to plan your characters before writing, you could opt to create all your characters sheets first, directly in the table. The My Characters database is accessed by clicking on the ![]() icon or navigating ‘Author’ → ‘My Characters’. Click on the
icon or navigating ‘Author’ → ‘My Characters’. Click on the ![]() icon to add a new sheet.
icon to add a new sheet.
From the Organizer
Characters in the Organizer
Finally, if you are planning your manuscript structure in the Organizer, you have the option to add new character sheets here. Click on the “Create New” button and select the table you wish to create the record in. Note, this option only provides access to the default tables, not custom tables you have created.
You can read more on the Organizer here: The Organizer
Profile Pictures & Avatars
Personalize your Character Sheets with a profile picture.
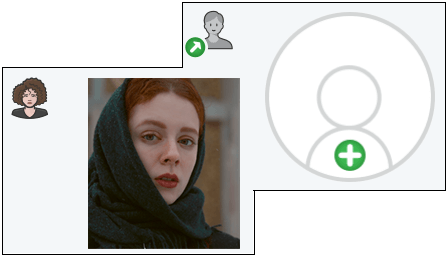
Make your characters even more identifiable with Profile Pictures and Avatars. Every sheet record has space for a profile picture on the main page. Simply drag and drop the image you want to display onto this place in the sheet. Alternatively, click on the ![]() icon on the top-right of the profile, to open your file browser and select the image. To change the image you can drag and drop a different one over the top, or use the
icon on the top-right of the profile, to open your file browser and select the image. To change the image you can drag and drop a different one over the top, or use the ![]() icon in the top right corner of the image to delete it.
icon in the top right corner of the image to delete it.
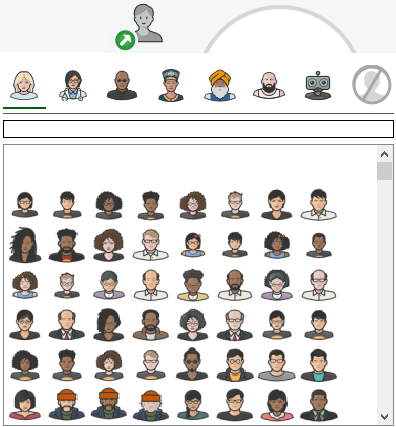
The avatar image options
Choose an avatar for each of your characters to manifest them throughout Papyrus Author. This could be used to group different types of sheet together–for example friends or members of a military unit. Or, you could assign a different avatar to every record. Click on the avatar icon to see the available images. Avatars can be hidden or shown on the records. As with all the field features. To show or hide the avatars, click on ‘Edit Mode’ and click “Show Avatar”.
Your Ideas
The second tab of the sheet is a free text area for drafts, brainstorming and formulating ideas for the character. Text options available are bullet or enumerated lists, and free text.
The Gallery

Save inspiring images in the Gallery.
Having only one profile image may not be sufficient for you, you may have sketches of your character or inspirational images found from the internet you want to keep with your character. As with the main profile image, simply drag and drop the pictures into the field.
There are two different views. The first view is a grid which will display the images spaced out and uniformly so you can easily see the images you have saved. Remove images by right-clicking and selecting “Delete”. The second view is free-form. Here you can resize the images and re-order them. They can be removed by clicking on the ![]() icon in the top right corner of each image.
icon in the top right corner of each image.
Linking to existing records
If you have already created the character sheet and you want to link a new word to it, this can be done by either right-clicking on the word and selecting “Link to Existing Sheet”. A list of existing records will be displayed for you to choose. Alternatively, you can open the character sheet and simply type the new word to link on. Remember to add a comma to separate the word from the others.
Customizing the Sheet
The sheets have multiple ways they can be customized. Some of the options will affect all the sheets for that table, but others can be changed on a sheet-by-sheet basis.
Color Coding
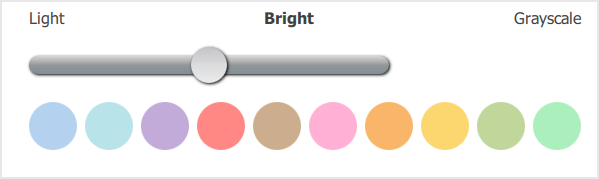
In the top right of the sheet dialogue is the color pallet. Clicking on the icon opens the pallet options. Choose from “Light”, “Bright” or “Grayscale”, the individual colors can be selected from the options below the slider.
Edit Mode
Beside the “New Sheet” icon is the “Edit Mode” icon. The first time you click on this icon, a message will be displayed to remind you that changes to the form structure will affect all records in that table. It is in “edit” mode that you can show or hide the avatar images on the records. See Profile Images & Avatars for more information.
The Pool
Choose which character details to keep in the character sheet.
Once in edit mode you can change the order of the fields by dragging and dropping them, or moving them to the “pool”–the area to the side of the sheet. This is a holding area where you can place fields you do not want to appear on the sheet. This can be temporarily while you are structuring the format, or permanently. If you want to reorganize the whole form, you can shift all the fields into the pool with the “Clear all” button. The “Fill All” button will do the reverse and add all fields from the pool to your sheet. The only exception to this is if fields have been added via the “Database” menu directly in the database view. These will need to be manually assigned to the sheet.
Renaming Fields
All the fields can be renamed. So, if for example, you have no use for the “Type” field, you could rename it. This is done by simply clicking in the field header and replacing the text. R
Adding new fields
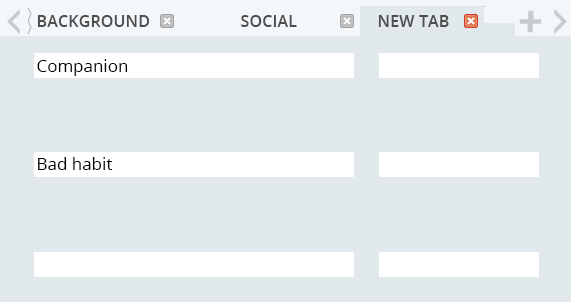
Add new fields, unique to your story.
Where there is an empty field, you can enter a field name and create this as a new field for your sheet. If there are no spare fields, you can create more by creating new tabs. Click on the plus sign to the right of the existing tabs. Change the title of the tab by clicking in the tab text.
Templates & Font
Papyrus Author has three default tables with every “My Characters” database. These are “My Characters”, “My Places” and “My Things”. Each table has its own template. These default layouts can be applied to any other table. Once in edit mode, the “Sheet Layout” at the top of the dialogue has a drop-down list for you to choose which template to apply. The layout changes the size and position of the image field as well as how the fields are displayed in the main top section of the form. As the layouts differ, there may not be enough room on the sheet for all the fields. Any that will not fit will be placed in the pool. You can then create new tabs to bring them onto the sheet, leave them in the pool or switch them out for other fields. Alongside the “Sheet Layout” is a field for the font size. Note that this relates to the size of the font in the data section of the field, and not the field labels.
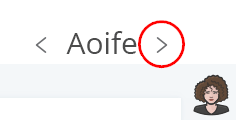
Use the arrows to switch between sheets.
Each character sheet can be opened by double-clicking on the linked word in your document. You can also access all the records directly through the database. Once you have a character sheet open, you can scroll through all the records. The arrows to the left and right of the main character name will take you through the records. The order of display is the order in which the records were created. Any sheet can be edited as you scroll. You can save the changes and move on to the next record. Sheets which are already open, and for example minimized, will not be shown in the scroll list.
Additional Sheet Options
Locations and items are important puzzle pieces of your story, and they have their own, unique Story Sheets.
“My Places”
Papyrus Author will create three default tables for you to use. The “My Places” table can be used for important locations in your story, or you can repurpose the table for some other use. As with “My Characters” the forms are customizable. You can add, move and reposition fields in exactly the same way. The only difference between “My Characters” and “My Places” is the template initially used for the sheet layout.
“My Things”
The “My Things” table is the third default table created by Papyrus Author. You can repurpose the table or use it for important props in your story. As with “My Characters” the forms are customizable. You can add, move and reposition fields in exactly the same way. The only difference between “My Characters” and “My Things” is the template initially used for the sheet layout.
Creating Your Own Sheets
Creating a new type of Sheets
Of course, you may need to create further tables to be able to track every element of your story. To add a new table, right click on the word you want to create a record for in the new table. From the context menu select “Link to Table” then “Create New Table”. In the dialogue, add the name of your new table, for example “Sports”. If your document is not yet part of a project, you will be shown the “Convert to Project” dialogue. Once you have given a name to your new table, a blank sheet will open in “edit” mode. Now you can choose your template – this will be only the layout of the sheet, no fields will be added for you except for the main “Name” field which is used for the link.
Link an old database to your project
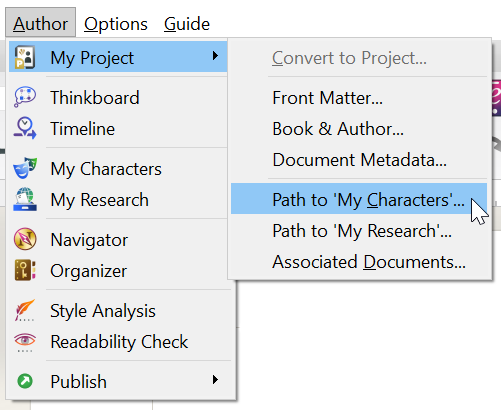
Access My Characters from the Author menu.
If you’re writing a series, you don’t have to recreate your database from scratch for each book. Papyrus Author has the option to link your document to an existing database.
Navigate to ‘Author’ → ‘My Project’ → ‘Path to My Characters’, and select the My Characters database you wish to use.
Using Database view instead of Character Sheets
For those users who created databases before version 2022 of Papyrus Author, you may wish to use the old-style data entry form for your existing projects. It is possible to do this on a project-by-project basis. So you can work in new projects with the sheets and existing projects with the forms if you wish. In the Character Database, click on the “Use database entry form instead of character sheets” button.
 samuli on April 6, 2022