
Table of Contents
“Paragraph Formatting” covers more than the format of characters in your document. It determines the layout of each paragraph.
The first type of paragraph settings determine where your text will appear along the ruler. These include the margins, the indentations, the line height, and the tabs.

Choosing text alignment
In the toolbar you can use the drop-down menu to choose your text alignment. You can choose a left-alignment  , which will give you a “ragged” right edge. The text can also be justified
  , which stretches out each line so that the left and right margins match. For certain texts, poems for example, the center alignment
  can be useful. You can also choose a right-alignment
  , which is useful for letter headings or page numbers.
You can make changes to your paragraph layout under “Advanced Paragraph Formatting.” Here you can change the line height, and if the text should be indented after an empty line or after a title. There are also settings for how many lines you want to “Keep with the following paragraph“, which avoids unsightly orphans and widows.
Line Height and Line Spacing
The buttons for line height and line spacing can be found in the toolbar directly above the ruler.
Choosing line spacing
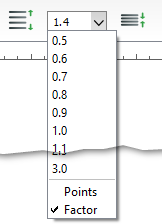
The drop-down menu allows you to choose your line spacing. This can also be done in smaller steps with the “increase line height” and “decrease line height” buttons to the left and right of this drop-down menu. If you want to enter your own number, you can also do this in the drop-down menu.
The line height is expressed as a “factor.” A factor of “1” will give you the minimum line spacing necessary for a font size of “10,”.
If you select a font size of 18, the line spacing will increase to accommodate the larger characters.
You can choose to measure the line spacing according to a specific font size, or “point,” by choosing “points” in the drop-down menu. This will measure your line spacing in font points, rather than in relation to the font size you are currently using. This means your lines could overlap if you have not chosen a large enough line height for the size of your font.
Advanced Paragraph Formatting
The corresponding dialog can be found in the “Paragraph” menu under “Advanced Paragraph Formatting…”
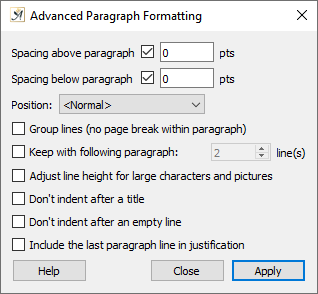
The Advanced Paragraph Formatting dialog
The settings in this dialog are valid for one of three options: 1. The paragraph in which your cursor has been placed, 2. All paragraphs within a selected range, or 3. For an entire Style ![]() .
.
There is an option to change the “Spacing above paragraph” and “Spacing below paragraph,” as well as to change the font point size.
The “Activate” Buttons ![]() allow you to choose which settings you would like to apply to which paragraph. If you have not selected an option, it will remain unchanged when you hit
allow you to choose which settings you would like to apply to which paragraph. If you have not selected an option, it will remain unchanged when you hit ![]() .
.
The following three settings are useful for the paragraph formatting of headings:
Under “Position” you can determine whether you would like the paragraph to always appear at the top of a new page or a new column.
“ ![]() Group lines” means that the lines in your paragraph will not be separated, even if they would otherwise fall on a page break. This option prevents a page break from falling within your paragraph.
Group lines” means that the lines in your paragraph will not be separated, even if they would otherwise fall on a page break. This option prevents a page break from falling within your paragraph.
“ ![]() Keep with following paragraph: [x] line(s)” prevents a heading from being separated from the following lines of the paragraph. This prevents your heading from falling before the page break and the paragraph belonging to it on the next page. You can choose the amount of lines you want to keep together, up to a maximum of 15.
Keep with following paragraph: [x] line(s)” prevents a heading from being separated from the following lines of the paragraph. This prevents your heading from falling before the page break and the paragraph belonging to it on the next page. You can choose the amount of lines you want to keep together, up to a maximum of 15.
If an area of text has been grouped together and is longer than one page, an alert will pop up saying “On page <n> there is a grouped area longer than one page.” The grouping will then be ignored, as the text will not fit on one page.
“ ![]() Adjust line height for large characters and pictures” will adjust the line height to allow for larger characters in your text.
Adjust line height for large characters and pictures” will adjust the line height to allow for larger characters in your text.
Then there are two options for running text: “ ![]() Don’t indent after a title” as well as “
Don’t indent after a title” as well as “ ![]() Don’t indent after an empty line.” These two options adhere to the standard formatting for novels, in which the running text is normally indented unless it follows a heading or chapter title.
Don’t indent after an empty line.” These two options adhere to the standard formatting for novels, in which the running text is normally indented unless it follows a heading or chapter title.
By selecting the option “ ![]() Include the last paragraph line in justification,” the last line of the paragraph will be justified and will be spread across the width of the entire line.
Include the last paragraph line in justification,” the last line of the paragraph will be justified and will be spread across the width of the entire line.
You can also access the “Advanced Paragraph Formatting” dialog in the “Style” dialog by clicking on “advanced.”
 on March 30, 2020