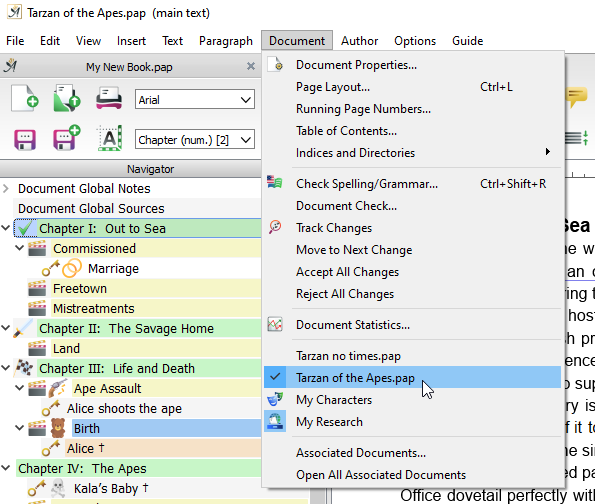
All documents belonging to a project can be accessed in the Document main menu
A project contains the main text and secondary documents, which include the “My Characters” and “My Research” databases and Notes. All the project documents are stored together in one folder, so you can access them easily.
These documents can be viewed and opened from the “Document” menu.
It’s also possible to add new documents to the project folder directly from your operating system. You can easily add “My Characters” and “My Research” databases later.
To open all documents belonging to your project, simply open the main document. You can also find a new document “projectname.papproject” in the project folder, which contains an up-to-date list of all documents belonging to the project. The papproject file opens all project documents as well.
Here’s how to start a project:
- Choose “Start” in the menu “File.”
- Select the “New Project”
 tab.
tab. - Choose the type of book you would like to write. The “Start” screen will display an image and description for each project template.
- Decide on a suitable name for the project.
- Choose the path where the project will be saved on your hard drive.
- Secondary documents (e.g. “My Characters” and “My Research” databases, notes, …) may be added later, mostly automatically.
Advantage: You can find everything in the same folder: your main text, your research, your character database, notes with additional information, …
Disadvantage: A project creates a folder structure immediately. If you simply want to write a text with nothing else, this might be too complex.
1. Creating a Book Project
“Start” → “New Project” lets you start a book or another large project. It is accessible from the “File” menu.
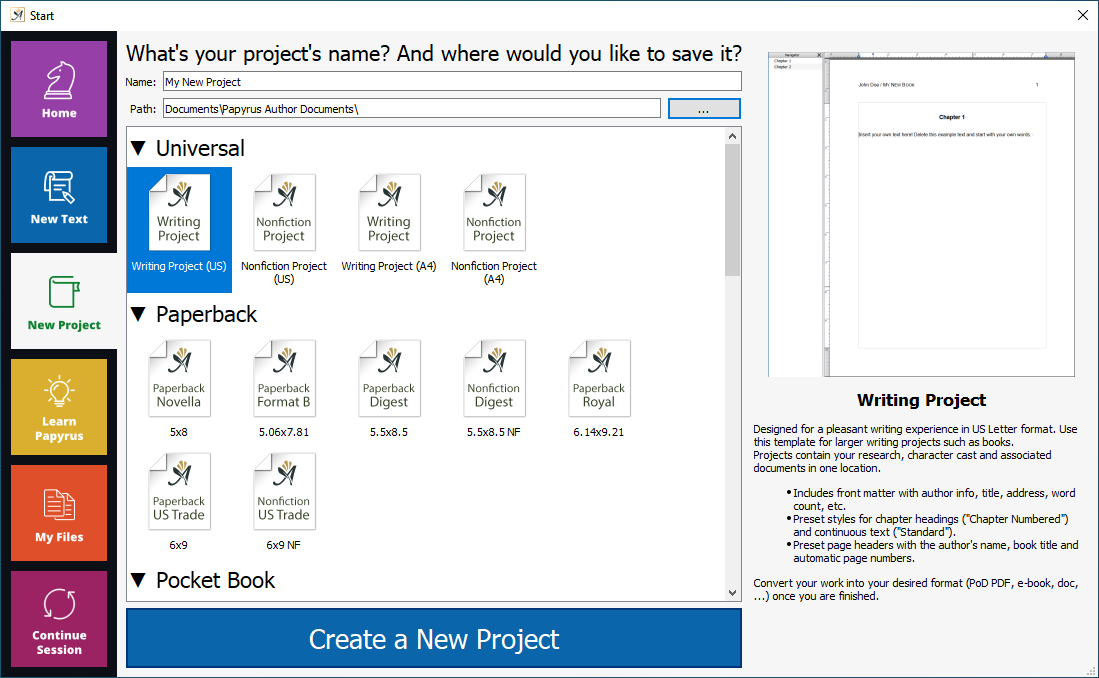
Simply choose the book project option on the left side, press “Create a New Project”, and you are set up.
There are several book project templates for you to choose from. Use “Writing Project” under “Universal” if you want the ‘default’ look.
The most important difference between a book project and a normal template is this: A book project will create a whole new folder in which all your project documents will be saved.
If you use the functionality of “My Characters” or “My Research” then the corresponding databases will be created automatically for you in your project folder.
This folder can also be used for other documents related to your project (PapyrusFolder/Template/Projects/); these documents can then be found under “Other.”
2. Converting a Document and Changing the Project Name
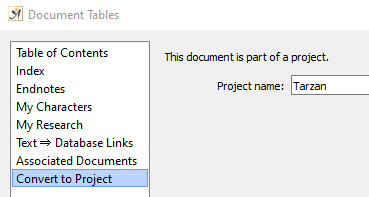
Change the project name anytime
The “Project” dialog can be accessed in the “Document” menu → “Indices and Directories”. If your document is part of a project, you can use this dialog to change the name of the project.
If your document is not part of a project, but you would like to create a project with it, you can use the button “Convert to Project” to do so. This is a useful option if your document has a lot of files attached to it, such as a character and/or research database. This option lets you keep everything together in a project folder, so you can find your files easily.
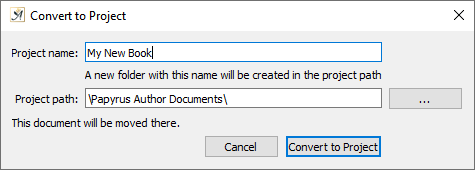
You can convert any document to a project
When you do complex operations with your document, like adding a research database, Papyrus Author will ask you to convert your text into a project. As a result, all files belonging to the main text will be put into a folder.

Papyrus Author will suggest converting your work to a project when you add elements such as a database
